
Here's an easy set of steps which show how you can use Amapi to create a keyframe based animation in which to morph (transform) a shape into another shape. Each shape even between keyframes can then be saved in its own DXF file, for example so as to use it with Vecta3D's conversion capability to generate vectors for Macromedia Flash. Another way to achieve this would be to do a final render in Amapi, e.g. into an AVI file, and extract the frames to perform edge detection on them (e.g. Photoshop or Illustrator combo). In order to get decent results, Amapi's clean cartoon style in the hybrid renderer can be used.
Let's start... in this very simple
example
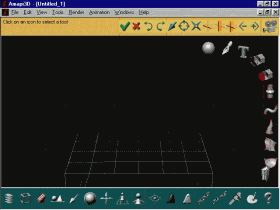
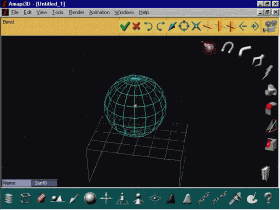
we'll just use a sphere. Get your front view (2) and select the sphere
from the construction toolkit.
|
I recommend using the natural design interface, also known as the Workshop interface. It's much more fun and performing. Use the basic wireframe display type in Workspace settings (Edit>Preferences>Workspace) |
 |
|
If the yellow assistant palette is enabled select the 'Render' toolkit in the upper right corner. Or simply hit the SPACEBAR to toggle to that same alternate toolkit. Select the icon in the middle which looks like a keyframe action taker from the movie industry (silence - camera - action!). Since this is the first keyframe for this object, it automatically gets inserted into keyframe number zero. But you could also drag-and-drop the object (sphere) into a different placeholder of the keyframe sequencer. Swipe the tool away when done. Then return to the Modeling toolkit (hit the SPACEBAR for example). We'll now start changing the shape for the next keyframe.
|
 |
|
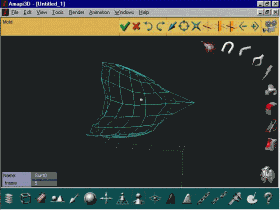
Use the arrow keys to select your view, e.g. from the front. Select the desired radius for the circle, using the plus/minus keys. Click and drag a few points of
the sphere
object and release.
|
 |
|
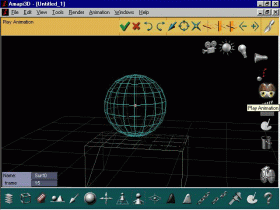
Select the keyframer again. The previously entered keyframe (#0) is still there. You can now drag and drop the new shape into the desired keyframe, e.g. #5 or any thereafter. Then swipe the tool away. You can now preview the animation by clicking the double-eyed icon just above the keyframer icon. You can even use the arrow keys during this preview to inspect what's happening from various angles. |
 |
|
Then return to the animation toolkit and save the new shape as keyframe 10. (your third keyframe)
|
 |
|
Enter the keyframer, and you'll see the current 3 keyframes which you have defined (even potentially with some gaps in between, i.e. not all numbered spaces have to be occupied, there may be gaps). Click the first frame and drag-and-drop it into the scene. You'll see the sphere take on the shape from keyframe #0 (the first keyframe). Then Drag-and-drop the sphere from the scene back into an open slot in the keyframer, such as the next available one #15, which becomes a new keyframe. It is identical in shape as #0. You now have an animation sequence with 16 frames (0 through 15) which is ready for previewing.
|
 |
|
If you have a floating view inset (menu: View/NewView/FreeView) you will see the sequence there too, optionally in shaded or wireshade modes, even from a different camera's vantage point if one is defined..
|
 |
|
Start by selecting the keyframer,. At the left edge of the keyframer, you'll see a counter with a current frame number and two arrows (left/right, e.g. increase/decrease controls). |
 |
|
From the File menu, select 'Save As...' or 'Export'. If using SaveAs, specify the format. Enter the desired filename according to the frame number (e.g. 0.dxf), in fact you can leave it up to Amapi to add the file extension (.dxf), so only enter the number (0). When you entered the name, Amapi asks if you want it to be saved as polymesh or not. Select your preference. Also, be advised that in the menu called Edit>Preferences>IOSettings, you can configure certain parameters for exporting to each format, including DXF, such as IOClean or IO Smooth objects, and whether X/Y/Z axes should remain X/Y/Z or otherwise swapped or inverted. After you have saved this first frame in a file '0.dxf', return to the keyframer, select the next value for the keyframe counter, which will change the shape of the object as indicated by the two surrounding keyframes. It would of course be nice if Amapi had a feature to save each frame in its own filename (with count number in filename) automatically, sort of in a batch process. That may come in the future, but in the meantime be sure to understand that you can further speedup this process by assigning shortcuts with the Shortcuts editor to certain keys. That way a function like SaveAs can be obtained without the need for placing and clicking the mouse on the menu (in fact that particular one is assigned to CTRL-E by the MFC window standard). |
|
You now have a bunch of files in DXF format, each containing a different shape from the entire aanimation sequence.
If you want a more automated
approach,
here's what to try next:
|
Select the Active Style materials collection or Create a new Style, and select Clean Cartoon, for example. Try various colors and also fill colors and edge widths. Select the Render>Settings options and apply anti-aliasing. Then hit ENTER to do a test render onscreen. If the rendering is good and shows good edges which will easily be detected in your imaging tool for edge detection, render this to an image file Render>RenderFile (Targa is default). Repeat the rendering for each shape in the animation sequence. The render to file command should easily be assigned to a keyboard shortcut to speed this up. If you Render the whole sequence
into an
AVI movie instead, then be sure to use no compression codec, or one
which
will allow your imaging software to extract the frames. Then again can
you pasas those individual images through the edge detection process.
Voila!
|

Selecting Anti-Aliasing 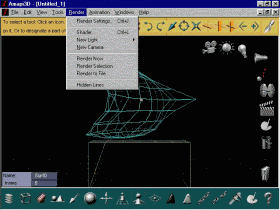 |