

Lava Textures - the Tutorial
Creating animated hot stuff in
Dogwaffle for use in 3D animation
[back to main page]
|
|
|
|
|
|
|
|
[back to main page] |
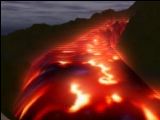
| Whether
it's water drops rolling down a window on a rainy day, or hot lava in a
volcanic eruption, or even a Matrix-like effect of text or streaks
flowing vertically down, Project Dogwaffle and PD Pro have a great set
of tools to help you make creative effects in the form of animated
textures which you can use for video special FX or to insert in 3D
projects by way of animated texture maps, transparency maps, refraction
channels and more. |
|||||||||
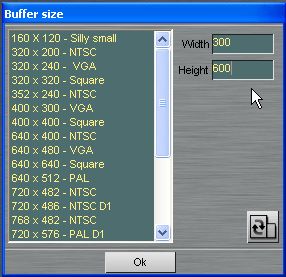
Getting Started When starting PD Pro, let's enter a size for our image buffer which gives it a portrait (vertical) shape. For example 2 times taller than wide. |
 |
||||||||
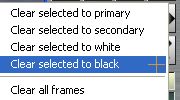
| Let's erase the buffer to
black: right-click on the Clear icon in the Tool panel. |
 |
||||||||
| If the secondary color happens
to be black you can in fact just left-click that same button. Or select
"Clear selected to secondary". Otherwise, use "Clear selected to black". This assumes you don't have an alpha selection (other than perhaps the whole buffer) in effect. There are other options to clear or fill the whole buffer in the Buffer menu. Check and try them out. |
 |
||||||||
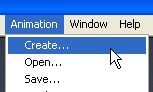
| Once we have a black background,
knowing that this is just one frame, let's turn this into an animation
of a great number of frames. Select menu: Animation
> Create...
|
 |
||||||||
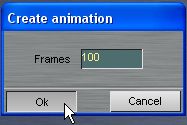
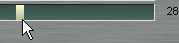
| The default is 30 frames. Let's
try 100 and click Ok. |
 |
||||||||
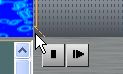
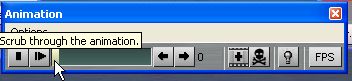
| The Animation control panel
appears. In PD Pro there's an Options menu for the Filmstrip mode. Notice the skull head for deleting the current frame, the "+" sign for adding a frame, the lightbulb for light-table mode (onionskins). FPS (frames per seconds) can be used to change the playback speed. |
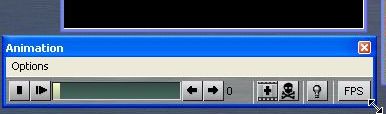 You can click and drag the corner of theAnimation panel to resize it and fit it where you want. |
||||||||
|
|
|||||||||
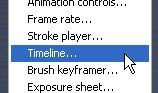
| The Timeline Editor Select menu: Animation
> Timeline...
to open the timeline editor. With this we can apply filters not only on a single frame, but across all frames of the animation, and even change the filter's parameters over the timeline. |
  Again you can
resize it to better fit your screen
and see more of the filters that are available. |
||||||||
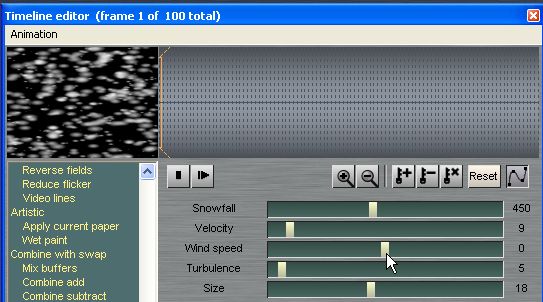
click this image for a full view.>>> Notice at the bottom-left of the Timeline: the Render button, the Undo button, and the checked box for recording undo info. Notice near the top right: the timeline of all frames. The Stop/Play buttons. The +/- buttons to add and remove keyframes. The reset button and the Spline mode toggle (enabled by default). |
 |
||||||||
|
|
|||||||||
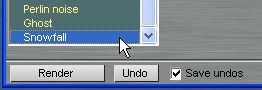
First Effect Filter: Snowfall Scroll to the bottom of the Timeline and select the Snowfall filter. |
 |
||||||||
There are five parameters appearing as sliders for this FX filter. Set the Wind Speed to zero (middle of the slider) so that the snow drops perfectly down vertically. Increase the size a bit, and the Snowfall amount |
 |
||||||||
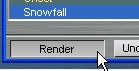
| Then Click Render. The same parameters will be used across all frames in this case. |
 |
||||||||
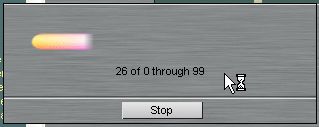
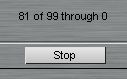
| PD Pro now renders the filter
across each frame. |
 |
||||||||
| Here's a Screenshot of PD Pro
after the rendering is completed. Notice the preview area in the upper left corner of Timeline. If we wanted to have more dense snow FX we could just re-render the same filter. |
 |
||||||||
|
|
|||||||||
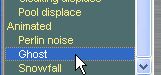
| Ghosting Let's select another filter now. |
 |
||||||||
| The default is 4 frames. We can
try more. Time to experiment.... |
 |
||||||||
| Click 'Render. This filter takes
longer the more frames you select on the slider. It blends that many
frames with decreasing intensity. This filter renders from last to
first frame. |
 |
||||||||
| At this time we should have an
animation which looks similar to this one. click the image to toggle on/off the
small version in Flash MX stream>> or download and view the original
AVI file (Xvid encoded) here: tut_save1.avi Yes indeed, this could also be a good starting point to make meteor storms. Especially when adding motion blurr... that will make them look thinner on either ends, a bit more like Perseid meteor streaks. |
|
||||||||
|
|
|||||||||
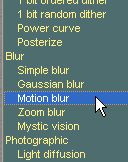
Motion Blurr Depending on your settings you might now see something that doesn't look anymore like perfect round snowflakes. Instead, they might more like tears or drops, wider below and thinner on top. |
 |
||||||||
| The Motion Blurr filter can add
a bit of vertical tearing and blurr. Use the 90 degree value on the
angle. |
 |
||||||||
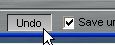
| If you didn't like the amount of
the effect, click the Undo button to step back to the prior state of
things. |
 |
||||||||
|
|
|||||||||
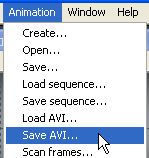
| Saving
to AVI File Frequent saving to AVI or image sequences is advised while you experiment. |
 |
||||||||
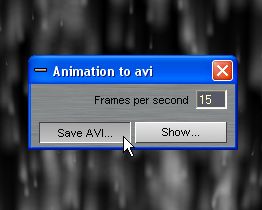
| You have one more chance here to
specify the frame rate at which you want the saved AVI file to playback. Then click "Save AVI..." |
 |
||||||||
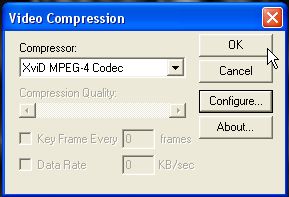
| You'll see a standard dialog to
select the desired compression codec. The list of course depends on
what's on your system. For Xvid check out this |
 |
||||||||
|
|
|||||||||
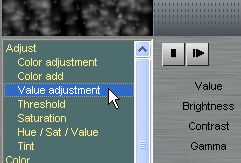
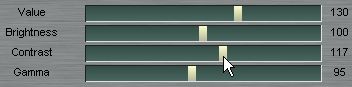
| Change Brightness&Contrast Ok, here's the next filter. |
 |
||||||||
| Increase Value and contrast,
decrease Gamma just a little. |
 |
||||||||
| We should have better contrast
now across the animation despite the smearing and fading effect of
blurr and ghosting. Perhaps something like this? |
|
||||||||
|
|
|||||||||
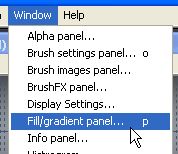
| Mapping the Gradient Lots of magic starts here: with the color gradient. Use the Window menu or 'p' shortcut to see the color gradient. |
 |
||||||||
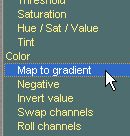
In the Timeline editor, select "Map to gradient" |
 |
||||||||
| Select the desired gradient from
the slider. This is the only parameter for this filter. |
 |
||||||||
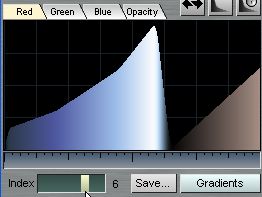
| To change the gradient, go
directly into the gradient panel. Use the mouse to shape the evolution from left to right for each channel. |
 |
||||||||
| Here's something interesting. |
 |
||||||||
| The preview of the Timeline
editor now shows the resulting effect. |
 |
||||||||
| Right here is a point where you
might realize it's 2 o'clock in the morning and you're not tired of
experimenting for hours and finding new fascinating results. Oh well,
there's always a catch when you discover great software :-) Here are a few examples I created by changing color gradients, adding variations to the parameters of certain filters (See further below), doing displacement mapping against something in the Swap buffer, etc... |
|
||||||||
|
|
|||||||||
| Setting
Keyframes Some filters are more interesting to use when changing their parameters over time. Drag the time indicator to the left (start) of the animation |
 |
||||||||
| Select the desired value of the
filter. For example, in this case the length while using the zoom blurr. |
 |
||||||||
| Click the keyframe |+| icon to
record the values for this keyframe. |
 |
||||||||
| Drag the timeline indicator to a
different frame in time. |
 |
||||||||
| Change the value(s) |
 |
||||||||
| Records another keyframe, and so
on. Along the top of the timeline you see red markers for each keyframe. |
 |
||||||||
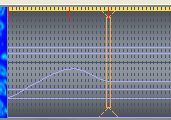
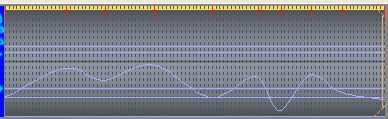
| Here's an example of several
keyframes with Spline interpolation between their values. If you Render
this then the intensity of the filter will change over time
accordingly. |
 |
||||||||
|
|
|||||||||
| Using the Swap Buffer Let's place ourselves at the first frame. |
 |
||||||||
| Then switch to the Swap buffer.
The keyboard shortcut is 'j' (for 'jump) The Swap buffer will probably be plain white blank at this time. |
 |
||||||||
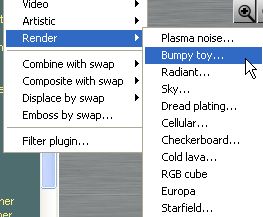
| Let's select a filter from the
Filters menu. This will be applied only to this one Swap buffer. Select Render submenu, and Plasma noise or Bumpy toy... |
 |
||||||||
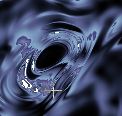
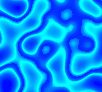
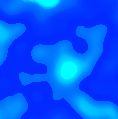
| There are many things you can
create with these. The idea is to create some sort of changes in the
swap buffer which are not too abrupt. Perhaps patterns like these
(using the gradient too). |
      |
||||||||
| Be sure
to jump back to the Main buffer when done Displacing by Swap |
|||||||||
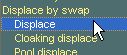
| Experiment first just on the
current frame, using the menu: Filter>Display-by-swap>Displace...
|
 |
||||||||
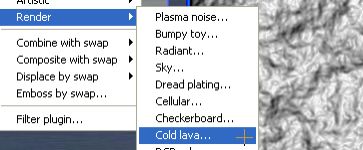
| There are other ways to get the
right image in the Swap buffer, by-the-way. Cold lava works too for
some effects. And you can paint your own of course or use a digital
picture from other sources. |
 |
||||||||
| When you're ready to apply the
displacement to the whole animation, use that option from the timeline. |
 |
||||||||
| Set the amount of displacement. Then click Render as usual. |
 |
||||||||
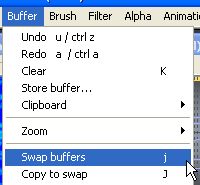
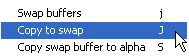
Yet another way to get something into theSwap buffer is by copying it from the Main buffer. Use uppercase 'j' (J) or the equivalent option from the Buffer menu: Buffer
> Copy to swap (J)
|
 |
||||||||
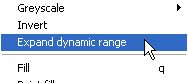
If the result is too dark (which can happen with some gradients or when applying filters like motion blurr and ghosting), a quick way to fix it is with the dynamic range expansion from the Buffer menu. Note that the first frame or two might be brighter than the rest because of how some filters work over several more frames. You might want to kill the first few frames so that you get a better representation of the dynamic range before changing it for all frames. |
 |
||||||||
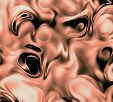
Chocolate, anyone? 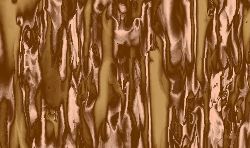 |
|||||||||
On to the Fire. |
|||||||||
| Ok, here's another starting
point. We've used large snow flakes this time, to saturate the area
with lots of white stuff. |
|||||||||
| Then we can use Contrast and
brightness controls to further enhance it. A proper red/black gradient does the rest. There are several good ones to start from in the 'Red' gradient set. |
|||||||||
| You can also add light diffusion
for a glowing look, and even Mystic vision. |
|||||||||
| And just one more (ok,
three more) |
|||||||||
| Here's another bunch of
snowfall
filters accumulated. We also wiggled the wind speed parameter a little
so some of the blobs don't go straight vertically down but do a little
zig-zagging left to right as well, just a little bit. This causes some
white areas to fuse and separate with their neighbors aside. |
|||||||||
Add some red hot color gradient and what do you get? Something bloody hot - is it fire in anti-gravity mode? is it devil's blood? |
|||||||||
| And just one more. This one
might actually better be played upside-down, since it might look like
fire. In PD Pro, you can reverse the animation, or you can also flip it up-side down. Depending on the shape of the 'flames' one may be more appropriate than the other. It's good to have both options. |
|||||||||
|
|
|||||||||