Don't be scared of trees which bark...
Original idea by Dan Ritchie
| "Trick or Tree!" Don't be scared of trees which bark... Original idea by Dan Ritchie |
|


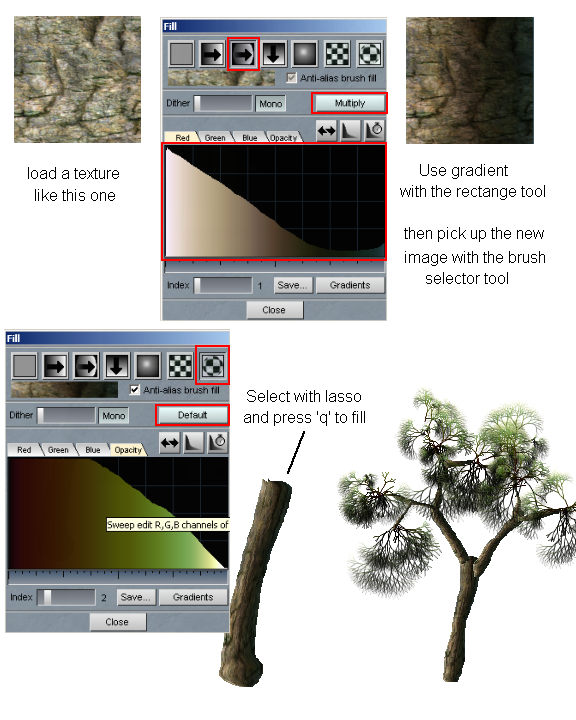
First, assume you have a Jpeg or other image file containing the picture of a piece of tree bark. Perhaps it looks like this: 
Ultimately we'll want to load it into our own user defined brush, so that it will be used when filling up outlines of branches. But to add a bit of pizzaz to it, we'll fake some sun lighting effect. On one side of the image, left or right, it will need to fade to dark. So, let's first load the bark image into the buffer (File/Open...) or if we already have a buffer, use Brush/Load... and apply the brush in an unused area of the buffer to see just one clean instance of the image there. In this example we'll have the image use up the entire buffer. 
Next we want to make one or the other side of that image fade to dark. Let's use the Fill tool, with a gradient. You can see the gradient in various ways. One way is to Right-click on the Fill tool 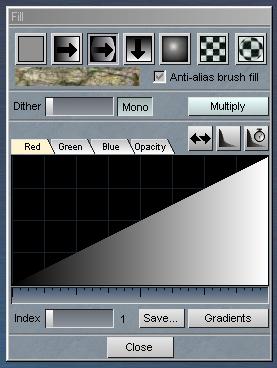
In the top row it shows how the gradient will be applied. The next row contains a dither slider and Mono toggle, and the all important operation mode (Default will replace colors with the gradient's colors rather than combine them). We will want to have it set to Multiply. The next row shows tabs for the color channels and a few toggle and smooth controls. At the bottom, the last row shows a selector of various predefined gradients, and a way to load other groups of gradient presets. So what is the gradient? It's a hint of color change over space or time. For example, in optipustics, over time as the particles fly around and leave traces, the colors of the gradient are applied as appearing from left to right. Note that there are tools to smooth or flip the current gradient, on each channel (RGBA). The default gradient goes from left to right as dark to bright (black to white). To flip it use the gradient flip button That may not be enough. Instead of pure grayscale you may want to give a touch or red'ish or green/blue tint on one end of the gradient. Go right in with the mouse and change the progression of the gradient for the selected tab (channel), Red, Greem Blue or Opacity. You can increase or decrease the current component (RGBA) anywhere in the gradient shown. Click the horizontal gradient or 
Ok, so we are in Multiply mode and horizontal gradient fill mode. All we need to do now is find a way to apply a big rectangular fill over the whole bark image in the buffer. We could use the Fill tool we saw earlier and set the Tolerance in the Flood settings as high as possible to fill all. But a faster way is to simply use the tool in Buffer/Fill... (shortcut 'q'). So hit 'q'. Because the gradient is applied in a multiplicative way, the dark colors of the gradient will darken the bark of the current image, while the bright parts leave it unchanged or only slightly changed based on the tint of the gradient. 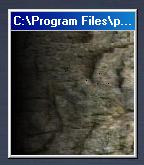 If we got it dark on the wrong side, we can just flip the buffer (Buffer/Flip/Horizontal)
or we can fix this later once we've loaded it into the brush (Brush/Flip/Horizontal
- shortcut: x).
If we got it dark on the wrong side, we can just flip the buffer (Buffer/Flip/Horizontal)
or we can fix this later once we've loaded it into the brush (Brush/Flip/Horizontal
- shortcut: x). The next step is to grab this image and load it into the brush. Again, there are many ways to do this. The fastest is probably the top option in the Brush menu, "use selected as brush", which has a shortcut (Control-c). Since we don't have a particular selection in Alpha, the whole buffer is selected, thus the whole entire image from the buffer gets loaded into the brush. So, now we have a custom brush with the bark going dark on one side where the sun don't shine. 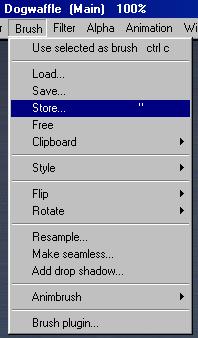 The next step is just a recommendation - save or at least store the brush.
Use the Brush/Store... menu item and you'll see the image of
the brush stored in a temporary subwindow placeholder. You can easily restore
this brush as the current one if you change the brush and later
want to return back to this one.
The next step is just a recommendation - save or at least store the brush.
Use the Brush/Store... menu item and you'll see the image of
the brush stored in a temporary subwindow placeholder. You can easily restore
this brush as the current one if you change the brush and later
want to return back to this one.You'll notice in this view a new item if you've used Dogwaffle 1.5 before. This version is 1.6 and has a new set of animated brushes, Animbrush. And to remind you if a stored brush is an animated one, you will see its stored image gently cycle through its frames. So cool! While we're at it, you'll also notice that brushes can easily be Resample'd... (with a slider, and even if they are Animbrushes!. Plus you can add a drop shadow right to the brush. So rad! And yes you can also make the brush seamless right there too. So wowser! 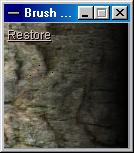
Ok, what's next? Now that the brush is defined and available (or reloaded if we saved the whole and went for coffee...) let's start with a plain white buffer of decent size. We will simply draw bits and chunks of the tree trunk and bigger branches and fill them with the brush. Not manually, but automatically, fitting the brush into the drawn shape of the tree. The brush can be warped to fit into the shape we draw in the selection buffer.  For this, we'll need to switch to a different mode of the gradient - in
the upper right corner of the gradient window, click the button which forces
the custom brush to be warped and fitted into the shape of a selection.
Also, make sure that the drawing mode is no longer Multiply, but back to the
Default (replace mode)
For this, we'll need to switch to a different mode of the gradient - in
the upper right corner of the gradient window, click the button which forces
the custom brush to be warped and fitted into the shape of a selection.
Also, make sure that the drawing mode is no longer Multiply, but back to the
Default (replace mode)Ready to test it? 
Try drawing an egg-like shape, or perhaps a long tube or carrotstick.. Not in the main buffer, but in the Alpha (selection) buffer. For this, use the Lasso-to-alpha tool in the Alpha tools section of the Tools palette. After the shape is drawn and you see the marching ants along the shape's outline, just hit 'q' to fill the selection as usual. What's not as usual though is that now we'll see that Dogwaffle will warp and stretch the custom brush in order to fit it into the shape of the selection. It won't just do a simply stretch or tile. 

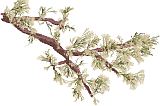
Now then, we're not in the business of drawing rocks here, we're after tree trunks, big logs and branches. Try a few elongated shapes. Don't think of the tree as a single piece, make the trunk in one or a few and then a few big branches going their own way each from the top or sides of the trunk. Then touch it up with some optipustics and add shades to the dark side. 
__________________________
|