

First steps with Shade 8 Standard:
taking the car for a spin
Here's what we want to accomplish in this first tutorial: placing a car from the model collection into the scene and spinning it around. Let's get started.
- step1 - getting started
- step2 - first rendering
- step3 - adding a camera
- step4 - keyframing a motion path for the camera animation
Preparing: Camera and other floating panels
It will be useful to have quick access to the camera settings, given that our approach will be to add a new camera and work with that, orbitting it around the car.
Click the View menu and select Aggregate or Camera. If you open the Aggregate panel you can click or double-click the camera icon.

Right now there's only one camera, named Meta-camera 1, but we will be able to select another one after we've inserted another. Let's just remember that this is the panel for all things related to the camera. Move it to the side to keep it handy.

click to enlarge
| Finally! 3D for everyone: Carrara (boxed) free shipping for orders $50 and up! (US only) Hurry before they're gone - this is a limited inventory blowout sale around $17 Carrara 3D Basics: so affordable!  around $40-$50 Carrara 3D Express: wow!  around $50-$60 Carrara 5 Standard: best value!  just around $100 Carrara 5 Pro: be a 3D Pro now!  |
The Shade Explorer
Also from the View menu, you can access the Shade Explorer, a window to many 3D models, images, sound clips and other resources on your computer.

You will want to set the catalog directory to point to where you installed the models that came with the Shade 8 on a separate content CD.
The down-pointing arrow in the upper left corner of the ShadeExplorer window can be closed when done. Note that you will find all other resource types there too: Catalog, Object, Surface,Background,...etc...
Inventory Blowout
Sale: Poser 6 (boxed!) at lowest prices: for MacOs or Windows |
Then select a car from the catelog and drag & drop it into the empty scene, near the middle.

Navigation basics:
When your mouse is over one of the 4 views, you can press and hold the spacebar. With the other hand, using the mouse, you can then navigate through the scene, such as panning through it sideways and up/down in order to better center on the inserted car.
You can also use the scroll wheel on the mouse if you have one. This gives you quick acess to zooming in & out. After a few steps you can arrange the views like this:

Changing the view layout
If you're working on a small screen or at low resolution, you may at times need to re-arrange the layout in order to favor one or the other views while you work with them. Simply place your cursor over the middle crossing of the 4 views. That will show a hotspot where the cursor changes to a 4-arrows cursor. You can click and drag this point around to dynamically change the sizes of the 4 views.

For instance, this will prove handy when we're positiong the camera along 4 points of a circle around the car, in order to animate the camera along that path.
| a great companion to
Project Dogwaffle: AnimeStudio is on sale!  Regular price: $59.95 (boxed!) |
Powerful
3D & CAD Illustrations with Quicktime VR, Includes large model
collection of vehicles Shade 8 standard edition Regular price: $99.95 |
One more: Background colors & Preferences
You may have noticed that the background of my views are light grey, whereas yours are probably showing plain white by default. I changed it to light grey for a few reasons. One was that I found occasionally that the camera I inserted would be white, and thus difficult to see against the white background.
You may want to do the same: select the Edit menu and click Preferences....
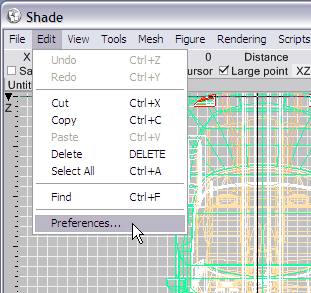
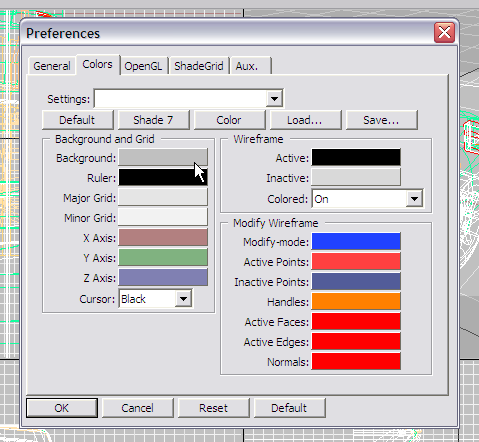
In the Preferences window, select teh Colors tab and change the Background color from white to light grey or whatever you prefer.
That's it, enough with the preparations, we paid for this software, so let's see what it can render.
- step2 - first rendering
| Make
Flash animations in seconds without scripting MotionArtist 4  Regular price: $49.95 Sale price: $15.95 |