
Virtual Terrains & Mountains
made or rendered with Carrara
Studio 3 and other variants
- more:Carrara Studio
There is a very nice terrain modeler in Carrara Studio 3, and with the more sophisticated shaders it got even better in Carrara 5.
This page will serve to show a few experiments with terrains, landscapes and stuff.
combine the terrain with local fog objects
and atmospheric clouds....

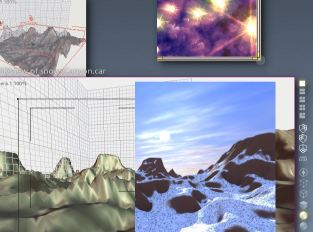
above: screenshot of assembly room. The terrain was created in the model room with the Terrain editor, starting from an elevation map image created in Project Dogwaffle. Click image for full view (1024x768 Jpeg)
One of the very important aspects of making good terrains is the shader. Shaders add rock sedimants of various colors. Shaders can add the appearance of vegetation, gravel, watery reflective surfaces such as lakes and rivers and melting wet snow.
In Carrara, a shader can have multiple channels, such as for color distribution, bump maps, reflection, etc... Each such channel can in turn be a simple color or a complex combination of many things: color gradients, texture maps, even animated maps (Quicktime or Avi movies and image sequences), and a variety of sophisticated controls. For example, a particular branch of the shader showing a certain color (e.g. white for snow) might be allowed to show only for certain elevations, or on a given range of slope (e.g. almost flat). There are mixers and other types of operators than can blend or combine various branches of the shader channels, and the criteria and operands of these mixers can in tern be the results of other criteria that evolve as a result of space and time.
Sample renderings:


Click image to enlarge:

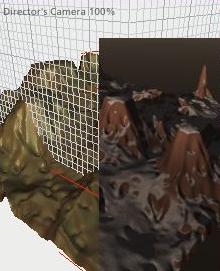
Snapshot of a quick test rendering (area render) with a terrain shader in the making (while inside the Texture Room).
- from a preset mountain scene. (Just added camera motion.)
[Quicktime movie -
double-click image to play, click to stop]
Notice that there is a
little bit of flicker in this particular animation. Part of it is due
to the compression codec. In part it's also due to not having used the
best anti-aliasing option during rendering.
Using Project Dogwaffle to fix noisy renderings:
In terrain fly-throughs, especially when there are numerous small, high-contrast elements such as white snow vs. dark rocks, it is difficult to avoid flickering. Sometimes the trick involves rendering at higher frame rate than final destination and higher resolution than desired one, so that you may then sample it down to the target resolution for color averaging on subpixel details as well as to blend two frames into one while time-compressing the rendered animation.
Sometimes however you're in a hurry when it's time to render, and you may have rendered an animation quickly without the best possible settings for temporal smoothing, anti-aliasing or other techniques for reducing pixel noise in motion. Furthermore, compression codecs may add temporal flickering. Project Dogwaffle (PD Pro Digital Painter) can then be used to remove some of these artefacts. Loading the original, rendered AVI file (uncompressed), we can time-stretch it up for more frames with frame blending, then back down to the original frame count. We can also use the Ghost filder from the Timeline editor to add a littl ghosting motion blur (2-3 frames) for additional blending. We can also resample the frames up to double the size and resample back down to the original. We can further add sharpen or blur filters. All of these (or just some of them) can result in less pixel noise, for a smoother animation.
Here is an example (compare with the prior animation above) the processed animation:
This technique may improve the visual appearance during animation, but potentially of course at the cost of lesser quality of a single still frame, for example there may be several ghosted images, as visible in the last image.
Same animations but embedded into a Flash MX stream:
Using Project Dogwaffle to fix noisy renderings:
In terrain fly-throughs, especially when there are numerous small, high-contrast elements such as white snow vs. dark rocks, it is difficult to avoid flickering. Sometimes the trick involves rendering at higher frame rate than final destination and higher resolution than desired one, so that you may then sample it down to the target resolution for color averaging on subpixel details as well as to blend two frames into one while time-compressing the rendered animation.
Sometimes however you're in a hurry when it's time to render, and you may have rendered an animation quickly without the best possible settings for temporal smoothing, anti-aliasing or other techniques for reducing pixel noise in motion. Furthermore, compression codecs may add temporal flickering. Project Dogwaffle (PD Pro Digital Painter) can then be used to remove some of these artefacts. Loading the original, rendered AVI file (uncompressed), we can time-stretch it up for more frames with frame blending, then back down to the original frame count. We can also use the Ghost filder from the Timeline editor to add a littl ghosting motion blur (2-3 frames) for additional blending. We can also resample the frames up to double the size and resample back down to the original. We can further add sharpen or blur filters. All of these (or just some of them) can result in less pixel noise, for a smoother animation.
Here is an example (compare with the prior animation above) the processed animation:
[Quicktime movie -
double-click image to play, click to stop]
This technique may improve the visual appearance during animation, but potentially of course at the cost of lesser quality of a single still frame, for example there may be several ghosted images, as visible in the last image.
Same animations but embedded into a Flash MX stream:
original animation
Dogwaffle-processed animation:


