|
Penny User Guide
- a work in progress
- Working with Penny &
Dogwaffle
- Viewing:
- Brushes
- Other
tools
|
|
Getting started with
Digital
Painting on a slim budget:

PD Artist
Draw,
Sketch
& Paint
powered by Project
Dogwaffle
|
|
|
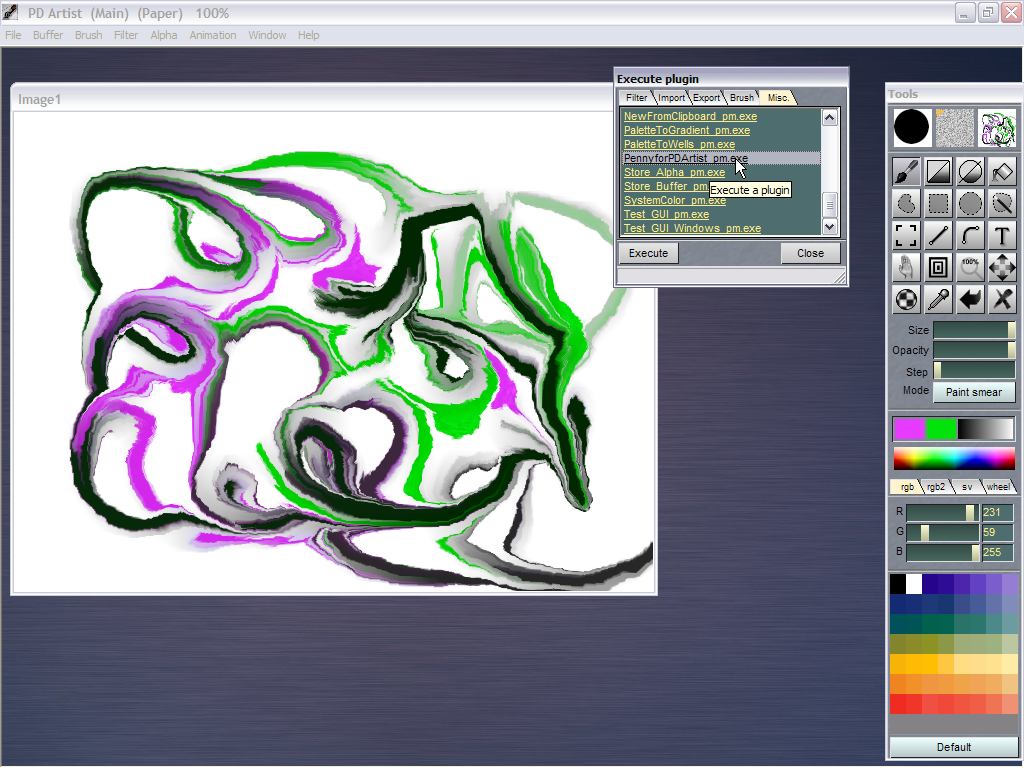
How to Start Penny
 How you start Penny depends
on which version of Project Dogwaffle you use. How you start Penny depends
on which version of Project Dogwaffle you use.
For example, the early versions of PD Artist and Dogwaffle
2.1 will let you launch it from the Plugins panel which
you can start from the Window menu. You might still find
it there too, in addition to other places such as the
Window menu.
Note that it is not necessarily included de facto with
your installation: you may need to download the plugin as
a free add-on. This applies to PD Particles and the
original, first release of PD Artist 1, for instance.
Launching Penny From the Window menu:
In most versions, like PD
Howler, you can launch Penny directly from its Window
menu:
menu: Window > Penny
Paint...
|


|
|
When
Penny starts, the first thing it does is to get a copy of
your current main image buffer's content and
create a new image buffer of the same size. A copy of the
image is then placed into that new buffer. You can then
start painting into it. The main image buffer from
Dogwaffle is still there, hiding behind the Penny image
buffer. You can actually still paint into it too. And you
can use some of Dogwaffle's tools like Paper and Filters,
but they will not immediately ffect what happens inside of
Penny's paint engine unless you use some specific commands
to transfer images between Penny and Dogwaffle or
vice-versa. image buffer's content and
create a new image buffer of the same size. A copy of the
image is then placed into that new buffer. You can then
start painting into it. The main image buffer from
Dogwaffle is still there, hiding behind the Penny image
buffer. You can actually still paint into it too. And you
can use some of Dogwaffle's tools like Paper and Filters,
but they will not immediately ffect what happens inside of
Penny's paint engine unless you use some specific commands
to transfer images between Penny and Dogwaffle or
vice-versa.
|
|
|
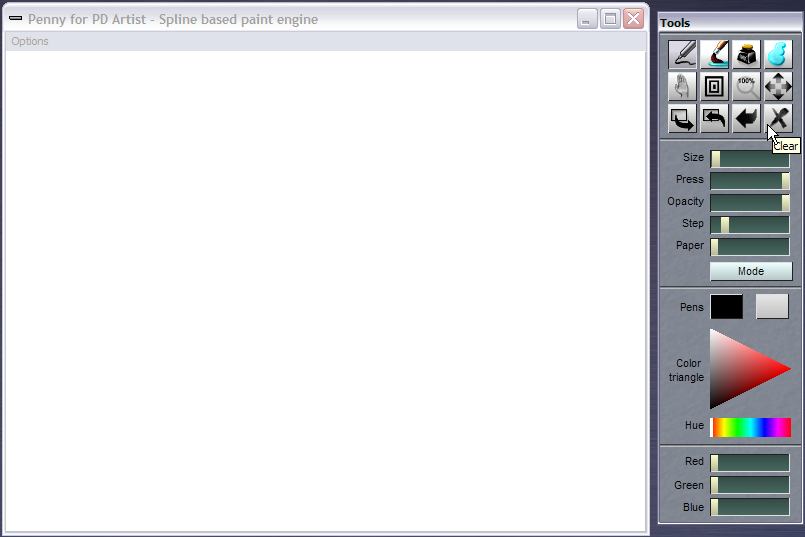
Clearing the Image
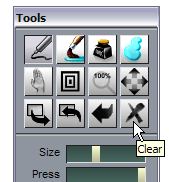 If you don't want to start
from a pre-existing image that was imported from
Dogwaffle's Main image buffer, or if at any time you wish
to clear the image and start from scratch again, use the
Clear tool. It's the big X in the lower-right of the tool
icons. If you don't want to start
from a pre-existing image that was imported from
Dogwaffle's Main image buffer, or if at any time you wish
to clear the image and start from scratch again, use the
Clear tool. It's the big X in the lower-right of the tool
icons.
This will erase to the secondary color in the Penny tools
panel. You can not change this color at this time (though
that may change in future releases).
|
|
|
Loading an Image from Dogwaffle
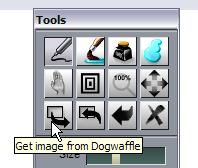
You can re-import an image from Dogwaffle's main buffer.
That allows you for instance to load a blank image of
another color.
The icon in the lower left is the tool to get the image
from dogwaffle. |
|
Undo most recent operation
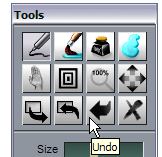
If you have drawn a few brush strokes on the initially
blank image, you can also just undo a few times until you
reach the original blank.
Keyboard Shortcut : 'u' for undo
Levels of Undo:
Penny supports different numbers of Undo depending on
which version of Project Dogwaffle you use. If you use
Penny 1.1 for PD Particles or PD Artist, you have 256
levels of undo. If you use Penny 1.1 for PD Pro 3 or 4
or higher you get 1024 levels of undo. With any earlier
version, including the freeware version 1.2, you get 64
levels of undo.
|
|
Sending the image back to Dogwaffle
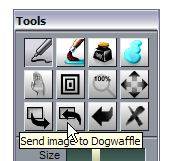
Click the icon on the bottom row, second from left,
to send your current image from Penny to Dogwaffle's Main
buffer.
The image is also sent back to Dogwaffle if you terminate
Penny.
|
|
|
Exercise: Start with a blank grey
image in Dogwaffle, load it into Penny, draw something,
send it back to Dogwaffle, apply a filter with some
effects such as blurring, load the image back into Penny
for more painting on top. Repeat this a few times,
applying additional blurring each time or other filters
for more sophisticated effects. Change brush parameters,
use different Penny brushes, with or without paper
texture, etc...
|
|
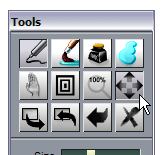
View control: Autofit to the Window
 There are several
tools in Penny's tools panel which are the same as found
in the main Dogwaffle tools panel, for viewing controls.
Expanding the view will show you as large an image view as
possible while maintaining the aspect ratio. If you make
the window larger by resizing it, the view will grow. If
you resize the window smaller (by grabbing and dragging
one of its conners) and then expand the view, the whole
image is still visible, but of course at smaller size. There are several
tools in Penny's tools panel which are the same as found
in the main Dogwaffle tools panel, for viewing controls.
Expanding the view will show you as large an image view as
possible while maintaining the aspect ratio. If you make
the window larger by resizing it, the view will grow. If
you resize the window smaller (by grabbing and dragging
one of its conners) and then expand the view, the whole
image is still visible, but of course at smaller size.
|
|
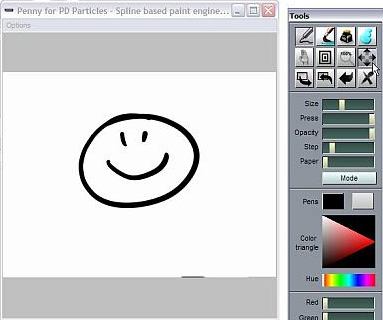
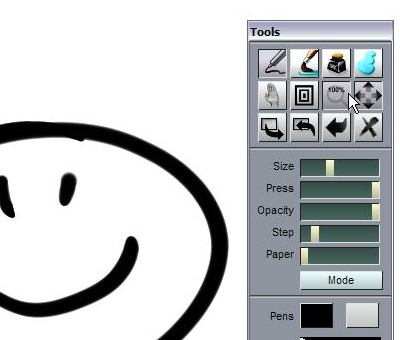
For example, if you had resized the Penny window to a
square shape, but the image in it is landscape
rectangular, you might see something like this. The image
containing the happy face is completely visible but
there's also a little bit of grey border region on top and
bottom of it.
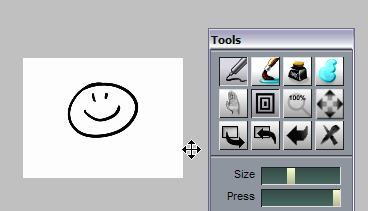
If the image was a portrait shape,
i.e. more tall than wide, some grey would show left and
right of it. Either way, the full image is showing as it's
been fit into the window borders.
|
|
|
View control: show 100%, As Is
The
icon next to the Autofit tool can be used to reset the
view to original viewing, 100% size as is. If the image
does fit on screen it will show in its entirety,
otherwise you'll only se a center portion of it. This
operation may and typically will resize the window if
you changed it before. It's a good way to reset the view
especially if followed by the Autofit if it is too big
to show the whole image onscreen at its original, real
size.
|
|
|
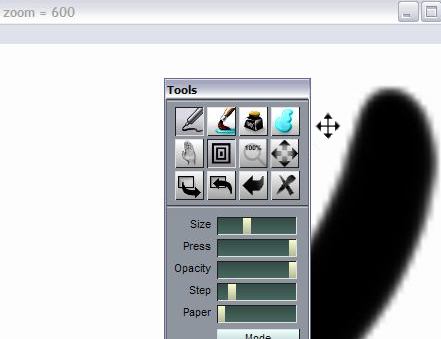
View control: Dynamic Zooming
The icon with nested boxed is for dynamic zooming. It's
fast and efficient to use: don't just click it, and then
go somewhere else to start zooming, that would be a waste
of time. Instead, just click-and-drag right from the
tool's icon: press the icon and hold the mouse button in a
down position, and start moving the mouse left or right.
Going left will zoom out, making the zoom factor and hence
the image smaller. Dragging to the right will zoom in, up
to 600% of the original zoom.
Drag
the zoom tool to the left to zoom out:
Keyboard shortcut:
Control-Shift-right-drag
You can also avoid the roundtrip to and
from the tools panel, in order to focus on your drawing:
press and hold the Control and Shift keys both at the
same time, then use the right mouse button directly on
your drawing and drag sideways. This will temporarily
stop drawing and change the zoom factor instead. When
you let go of the Control and Shift keys it goes back to
drawing mode.
The minimum zoom is 20%, the maximum is 600%
|
|
|
View control: dynamic Panning
Similar to the zoom tool, you can click and drag the Hand
icon to start panning.
Keyboard shortcut:
Control-Shift + Left mouse button drag
Using the keyboard shortcut helps in
keeping your eye on the drawing without distrations
to the interface just for zooming or panning. Use
both hands if you can, it will make drawing and
painting with Penny all that more enjoyable.
|
|
|
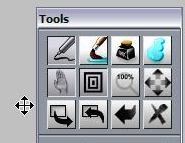
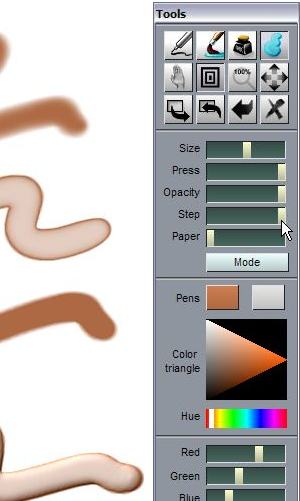
Brushes
The top row of icons offeres 4 basic brushes for
cartoonists, comic artists and anime line artists:
- a Pen
- a Water brush
- some Ink
- and a fancy Gel brush
Here's a quick look at what they look
like:
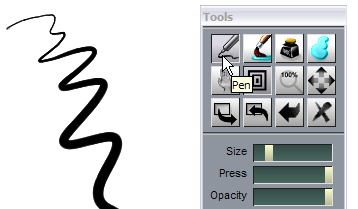
Pen
|
|
|
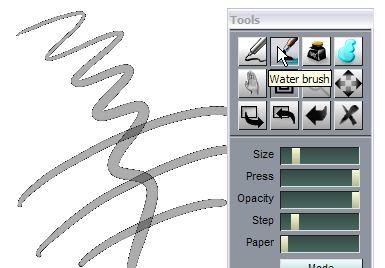 Water brush Water brush
|
|
|
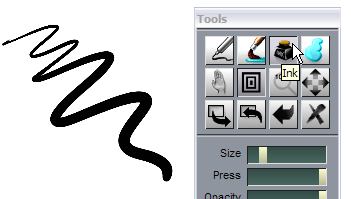
Ink
|
|
|
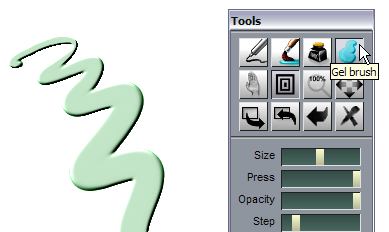
Gel
|
|
|
Size control

The Size slider let's you adjust the upper limit of your
brush image's size. It is still of course under the
influence of the pressure you apply when using a tablet.
The initial brush size is very fine, you might want to
make it a little larger.
|
|
|
Step distance
In raster imaging and painting, a brush contains
an image which is stamped down (depoited) into the
drawing area whenever the mouse has travelled far
enough. That distance is defined as the Step
distance. You can change the step value by its
slider.
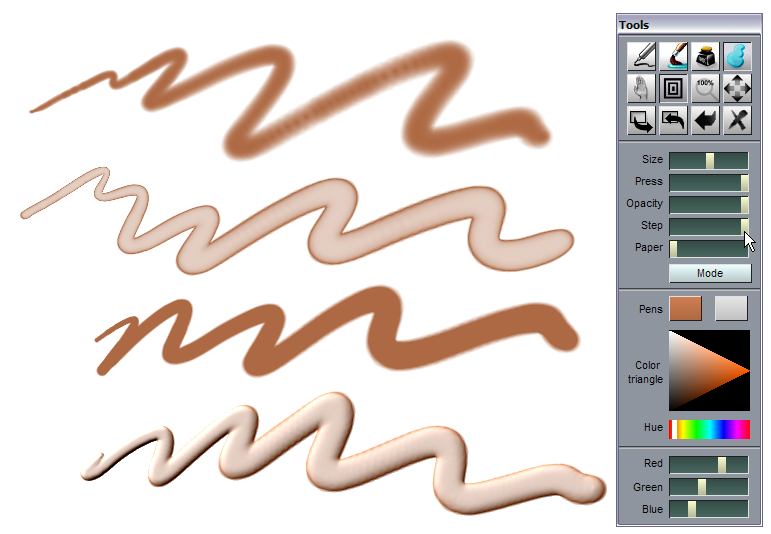
When the step value is small, the brush images get
stamped down very often, close to eachother. Only
a small movement is needed with the mouse of
tablet pen to trigger another one coming down and
join your brush stroke in progress.
click
the images for larger views
When
the step value is high, the stamped images are
sparse, farther apart from eachother. With
large values of Step distance, you can even
see the individual images from the brush
(small circular shapes in many ases). That's
what you'll expect with the regular Dogwaffle
painting engine. With Penny however, there's
still some interpolation and thus additional
stamping down of the brush images. It's
possible but difficult to see the individual
images as they barely separate at all. But,
there's some side effects which may be useful.
The ink or gel levels get less intense, less
opaque.
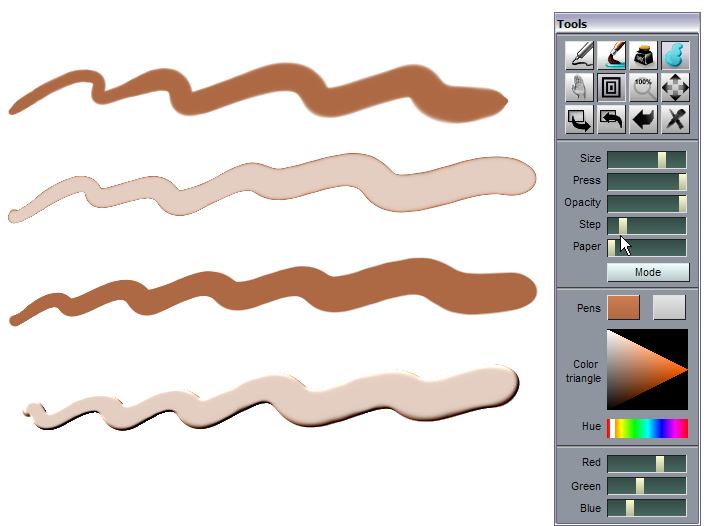
The
side-by-side
images above illustrate brush strokes with the
4 different brushes, left with small Step
distance, right with high step value.
|
|
|
Color Picker from current Image
You can select a color from the color picker widget below
the tools, but that may not allow you to pick a color
which is already in the painted image buffer.
Instead, you may want to press and hold a key just in
order to temporarily switch to an interactive color picker
which will let you switch to using the current image
buffer as a color palette: you can drag the cursor in the
image to select the desired color from amongst the ones
which are already in the image.
Simply press and hold the komma key: [ , ]
The cursor will change from a small cross to an arrow
pointer as long as you keep the komma key pressed in the
down position. When you let go of the key, the operation
of the program returns back from color picking to painting
with the current brush.
|
|
|
|
|
|
|
|