

Discovering
Blender
"das ist Blendend"
"das ist Blendend"
| More: |
| Tutorials |
| PD Particles |
| PD Artist |
| PD Pro |
| PD Pro Tutorials |
| TheBest3D.com |
| Hot: more Blender Links (including a
Dogwaffler!) |
Some of the funniest TV commercials we've seen around are for an irish beer named Guiness - " Brilliant!" ("Don't drink 6 cans of beer all at once?!? Brilliant!") LOL hillarious The Germans too have great beer, and they'll say 'blendend' when something is strikingly outstanding, beautifully blindening and, ...well, brilliant. My first attempts and experiences with Blender, however, were not so brilliant, 'blendend'. I quickly got lost in a sea of tiny icons and a user interface that was quite confusing to my old, aging eyes. The small fonts didn't help. The zoom feature attached to the side button on my Microsoft Comfort Optical Mouse 3000 however, did, and so I persevered. I had tried over the prior years to get into the Blender spirit a few times. I had seen good stuff, read great feedback, and recognized that Blender addicts are in many ways similar to users of Project Dogwaffle - they've seen the light. But the UI was not meant for easy baby steps exploration by trial and error into the 3D world. It was meant to be a speed demon, highly optimized for fast and swift operation to get to great results quickly - if you knew how to get there in the first place. And, I didn't Help eventually came from the internet, in the form of a posting on the Blender user forum at yahoogroups. A very helpful fellow Blender user (thanks Myscha aka novawoman!) came forward with a few tips and straight step-by-step guidance, in answer to a plea for help posted earlier on that forum. This tutorial is in large part inspired by feedback from Myscha, and dedicated to Myscha. As also pointed out by another poster on the above forum, Blender was developed for fast workflow, not easy learning. You've got to get into the Blender spirit through a few good tutorials aimed at seeing the light in the interface: http://en.wikibooks.org/wiki/Blender_3D:_Noob_to_Pro An another helpful Blender user pointed me to this great resource: Blender Basics: http://www.cdschools.org/54223045235521/lib/54223045235521/BlenderBasics2ndEdition.pdf Good, so I'm not re-inventing the wheel. Just jotting down my notes and focus points from my perspective. |
|
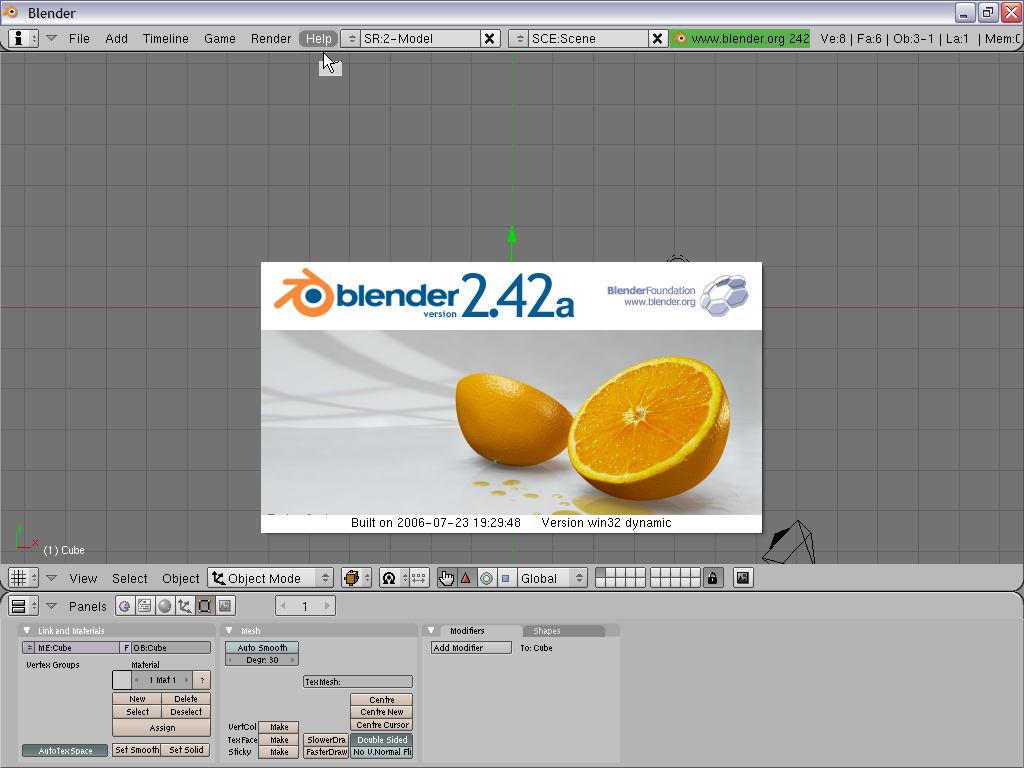 |
Ok, here goes... (Screen
captures and cropping for this tutorial were done with another great
(and free tool) - Irfanview,
function key was F5 assigned to capture.) Here's the view after launching Blender, and clicking on Help>About Blender... to see the version info. I noticed immediately that this beast was indeed made for speed. If I only moved the mouse by a pixel, the about panel went away. I guess they really want you to get back to the fun of modeling and rendering asap. |
 |
Deleting an Object from
the Scene A lot of things go faster with keyboard shortcuts in Blender, and the mnemonics of the shortcut are made to 'stick' so as to easily remember them. Single-key shortcuts are great, we do that in Project Dogwaffle too (u for undo, a for again, o for options of the brush...) The default scene comes with a cube, and it's the currently selected object. Just like 'X' marks the spot on the window decorations where you can click to close a window, so does 'x' delete the current object: tap the "x" key to delete the default cube. A quick dialog pops up and asks for confirmation. Click and be done with it. The cube is now gone. Of course you can undo this, with the standard Control-Z shortcut. Note there's no Edit menu... so no Undo item in such menu. Perhaps it is somewhere else, and it will make perfect sense for speed modeling as we proceed. |
"Gimme some Space(bar)!"   |
Adding a new Object to
the Scene. Many programs use the spacebar to easily access one of the most important tools or functions, because it's so easily reached by either the left or right hand. AutoCAD uses SPACEBAR to end the current tool in addition to ENTER, and also to restart the most recent tool. Likewise, if inserting a new object is a very common task in Blender, then in makes great sense to use the Spacebar to initiate insertion of a new object. Hit [space] and select from the popup: Add > Mesh > Plane So it actually is even more powerful, it popsup a great deal of things, commonly used tools. One is the action of adding new objects, of various kinds, depending on how you click through that popup menu. What I already start to like here is that I don't waste my time anymore moving the mouse to the menu bar. I click SPACE with the left hand while my mouse is in the right hand, ready for action. It reminds me of my favorite modeler, Amapi, where I became one with the program, both hands busy viewing and modeling, chiseling away and navigating, and hardly ever needing to move my eyes to the top of the window. Well done. What's more, if I repeat this Spacebar trick just for grins, the menu has changed - it remembers that I asked for a mesh just seconds ago, so it thinks I might still be interested in that this time, and bypasses the second menu (Mesh, Curve, Surface etc...) to land me straight into the objects of the same type. This again is a great time saver, if indeed I want to add more of the same types. And I frequently do. I'm sure there's a way to get that original, full menu back, like using Control or Shift or something along with SPACEBAR. Wait, what's that light over there? I think I'm starting to see the idea in the interface design. Brilliant! |
  |
The corner vertices should appear as yellow dots, meaning they are selected, so hit "s" (as in 'scale') and drag with the mouse to scale your plane as large (or small) as you want. s)cale a rubberband line shows, from the center of the object to the mouse cursor, and scales the object as you move the mouse. Quick and easy. Click again when done scaling. |
   |
r)otate Likewise, "r" triggers an interactive rotation of the selected object. Tap 'r' once and you'll start rotating in the axis that dives into the screen, perpendicular to the plane. Click the mouse when done. While in the rotate mode, if instead of clicking to stop you hit 'r' again, it switches to rotating around the other two axes. Use Control-Z to return back to the scene which has the plane scaled, but not rotated. OH MY GOD ... just for grins I tried 'u' for undo instead of Control-Z... and it works, just like in Project Dogwaffle. Brilliant! And SHIFT-u (U) does the opposite of undo,. i.e. it does the redo, like Control-Y. Too bad 'a' doesn't do a redo like 'again' like in Dogwaffle. But if 'a' is not already assigned a default action (is it?) then I'm sure it's either possible to customize your own shortcuts somewhere, or they'll have 'a' for again added in a future edition of Blender. I mean how cool would that be. But I digress.... it's time to move on to the background sky. Before that, however, let's do what everybody needs to do a whole lot more often that they think: save often. menu : File > Save As... (great F2 function key shortcut) |
 |
The Sky so Blue There is an Edit mode and an Object mode. And a few more modes, actually, but the most important ones are Edit or Object modes. We're initially in Edit mode. hit [Tab] to switch from Edit mode to Object mode Or use the mouse to click on the menu and change the selection to Object Mode. |
 |
Next to the mode menu, there's also a Draw type menu, for bounding box, Wireframe, Solid or Shaded and Textured display. This might come in handy later. |
  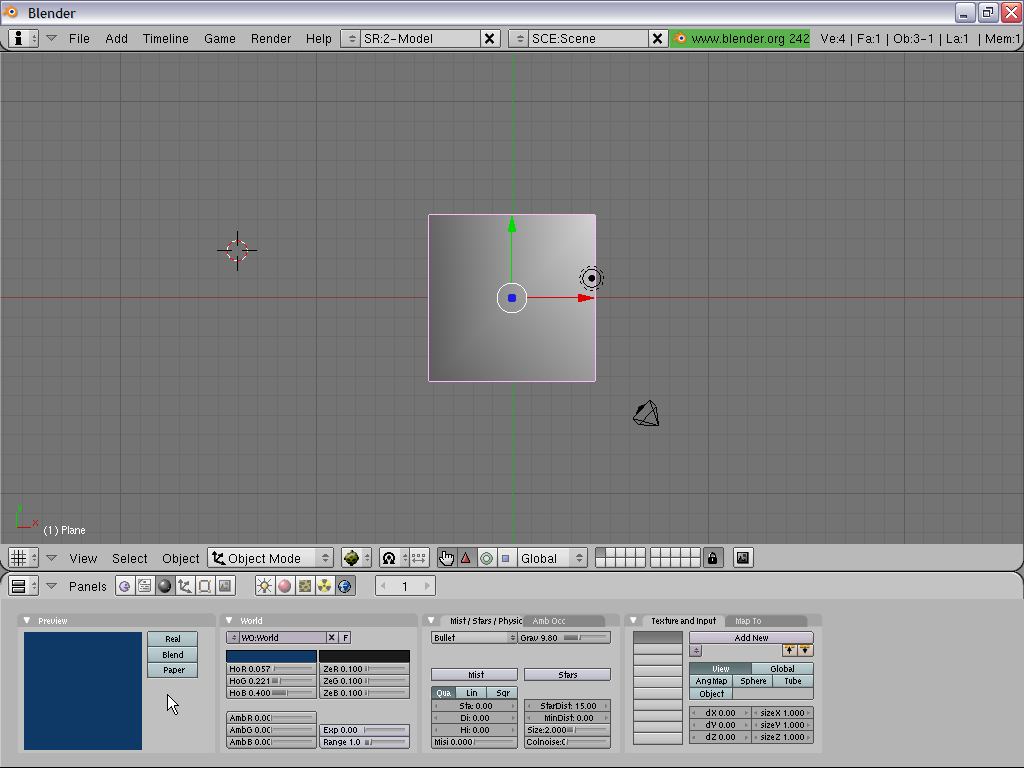 |
Then, locate the small globe button on your control panel (typically near the bottom left of the screen unless you have changed your setup), and click on the globe button. It is amongst a small group of several icons belonging to a choice of 'Panels'. Function key F8 will go there too, or click on the 'Panels' label, and select in 'Shading', the 'World'. Your control panel should now show World settings, typically a dark blue preview panel, with [Real], [Blend] and [Paper] buttons next to it. |
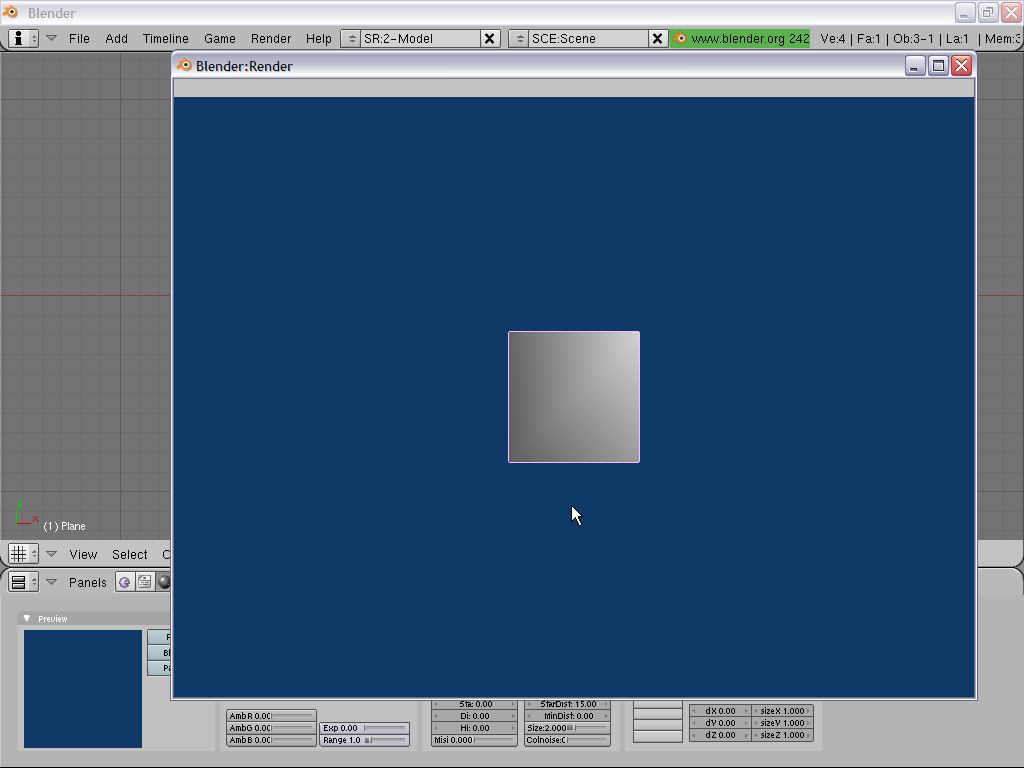 |
You can see that
that's the background sky currently in use when rendering. Click the
icon near the mid/right on the control panel, for rendering the current
view. |
 |
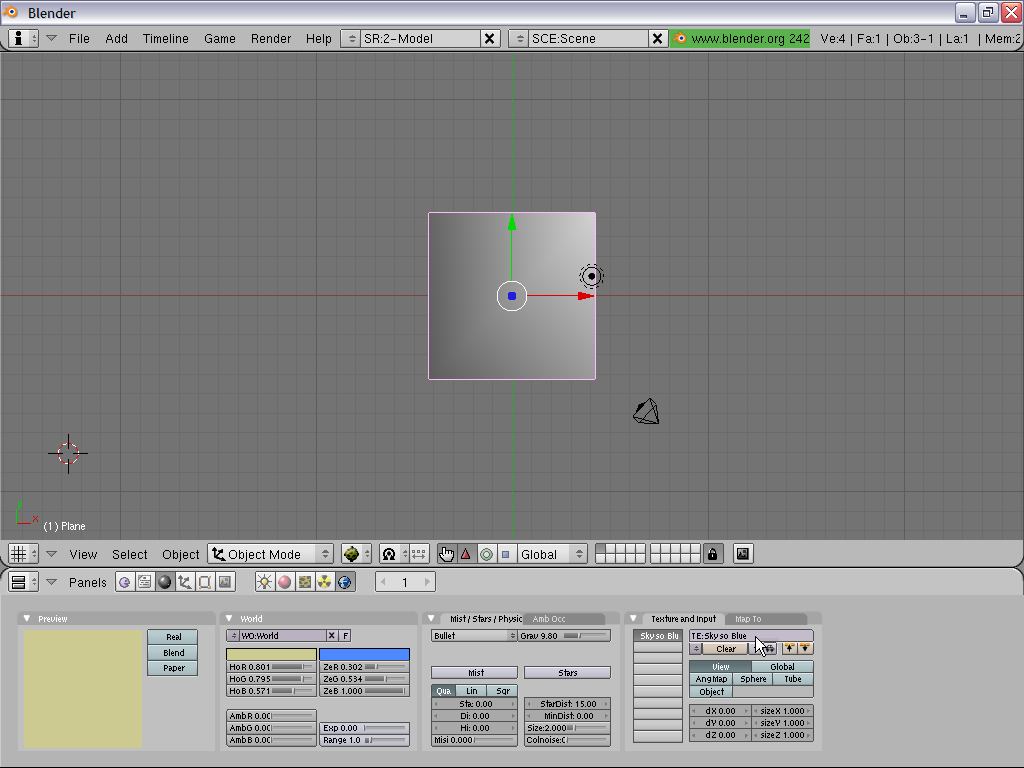
Here's how to change the
colors. The sky has a Horizon color and a Zenith color. Start by setting the HoR, HoG and HoG sliders to 1.0 for a light horizon value, or close to that for "LosAngeles-grey"... then leave ZeR and ZeG at 0.10, but slide ZeB up to 1.0 for a deep blue sky directly overhead. Of course you can fiddle with other values, more red if you live on Mars :-) Note that a rendering may not yet show the transition to blue, depends on what camera and angle is used etc... |
 |
Now locate the "leopardskin" button, to the left of the "globe" button and click it. It opens the Texture panel. We should be able to use it to apply some texture to the sky, for clouds. |
 |
On the "Texture" panel, click [Add new] |
  click for larger image |
Select the Texture Type -
click the button and choose something from
the menu, such as Clouds, which is some sort of procedural plasma noise. Aha, here's also a good place to try using a picture of the skies you've taken with a digital camera, using the 'Image' option instead. Perhaps we'll try that with one of these pictures, |
 |
For now, let's continue
with the procedural texture generated by Blender. As you work with multiple textures and pictures it'll be good to give them unique names you recognize. In the listbox that says "TE:Tex.001" you can click to change the texture name to something meaningful, for clarity and [Enter]. |
 |
Clicking on the "Globe"
button again, or using F8, you should find that your "Texture and
input" panel tab (righthand side of control panel) now includes your
cloud texture, with whatever name you gave it. |
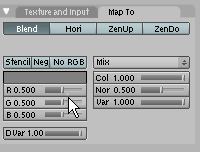 |
In the same group as the "Texture and Input" tab, click the
"Map to" tab, and you will see the default color preview for the
texture, a hideous magenta. Use the sliders to change the color to something more acceptable for clouds, i.e. R 0.890, G 0.885, B 1.000 and ... |
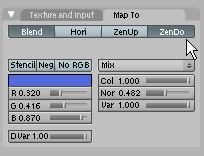 |
...then click the [Blend] and [ZenDo] buttons, to blend the texture from the zenith down. |
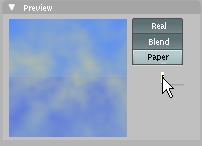 |
Finally, click the [Blend] and [Real] buttons next to the preview panel (left of control panel) to preview the result. |
 |
Finally, [F12] will show a preview from the default camera angle, looking down onto your plane, with the sky behind. |
 |
Time to play so more with
these color sliders for Zenith color and Horizon color until you get
just what you want. Or change the Texture type to one of the pictures. |

Wow, soo much to learn and discover, but it starts to really look like a very comnlete program. Just check these Import and Export options:


There seems to be some good amount of support for other 3D tols, such as Lightwave and even SoftImage, known to be a very high end animation tool. Could it be that some professionals are using Blender for speed modeling and send it over to S.I. XSI for animation?
As for me, I'm just happy to see Wavefront OBJ, and other formats that I can save from Amapi, still my favorite modeler - here's in fact a rendering of my favorite little elephant model made in Amapi . There's also a good amount of Mist (fog) and the default lamp was changed to a spot light.

The rectangle making the ground floor is carrying one of my own seamless grass textures painted in PD Pro - woohoo!
Evidently I'm making progress and starting to get it. This and other techniques will be shown in more detail in other tutorial sections to come.
stay tuned, for more...
- this is part 1 - part 2 : the bridge of love - more Blender Resources