

of Xeno-waffles
and Dog-Dreams: Using
XenoDream with Project Dogwaffle

| To Probe Further: |
| XenoDream.com |
Opening an Animation from AVI file 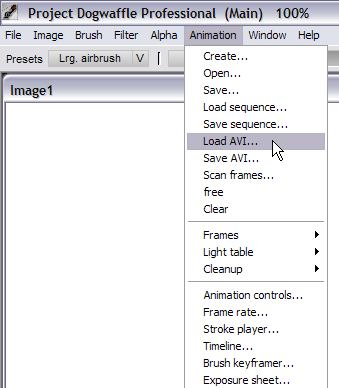 Unlike images which are loaded from the File>Open menu, an animation is accessed from the Animation menu: Animation > Load AVI... Select the AVI file. In this example we'll use one that was created earlier from PD Pro, but it could be an original from a different application or XenoDream. 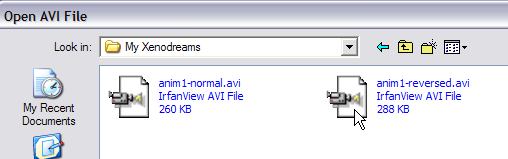 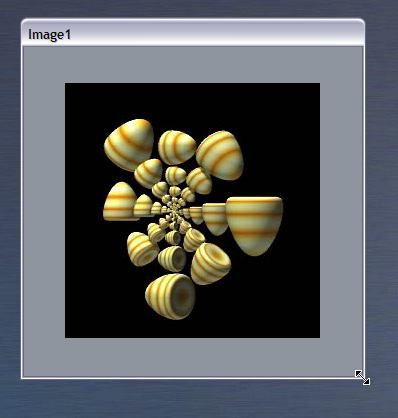 You
may want to see the space 'around' the actual frames. Grab the
lower-right corner of the window containing the animation's frames.
Drag it a little to the lower right to see the grey space around it. You
may want to see the space 'around' the actual frames. Grab the
lower-right corner of the window containing the animation's frames.
Drag it a little to the lower right to see the grey space around it.This will allow you to reach outside of the image in order to select it all and pick it up into a custom brush. Of course, in some cases you might want to pick up just a portion of the image, or a selection. In this example we'll want to select it all, the entire frame, so we need to make the window larger so as to be able to manually select it all. Or you could use the toggle in the Alpha menu (Alpha on/off) to see the current selection, which by default is the full frame. Pre-selecting the Background color for Transparency 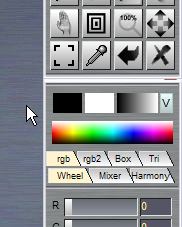 You may want the background color (black in this example) to become transparent in the brush you're about to pick up. One way to pre-arrange this is by setting the secondary color to the same as the background you want to key on. In this default example here we have black as the primary color (left box), and white as the secondary.  Picking a color with the color picker: 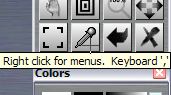 Another
way to assign a color to the secondary color is by using the color
picker, or turkey baster. This lets you select a single pixel or a
group of pixels (3x3, 5x5) centered on the picker's position. The
picked color goes to the primary color if left picked. If picked with
the right button, it becomes the secondary color. Another
way to assign a color to the secondary color is by using the color
picker, or turkey baster. This lets you select a single pixel or a
group of pixels (3x3, 5x5) centered on the picker's position. The
picked color goes to the primary color if left picked. If picked with
the right button, it becomes the secondary color.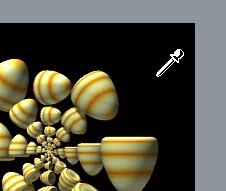 Use
this with a right-click to pick the background color and assign it
to secondary color. Use
this with a right-click to pick the background color and assign it
to secondary color.Here's a trick: You don't have to switch to the color picker tool with the tool shown above. You can stay with the current tool, and use a handy keyboard shortcut: the komma (,) While you press and hold komma, the tool is temporarily switched to the color picker, and returns to the prior tool when you let go the key. Picking up a single frame as a Brush If you've never used the brush pickup tool, then you haven't worked with DOgwaffle to its full potential yet. The core and heart of Dogwaffle is centered around the custom brush, and the ability to quickly and intuitively create your own by lifting or picking up a portion of the image you are looking at. In the lower left of the tools collection, left of the color picker, you'll see a square-brackety icon. It's the custom brush pickup tool. The keyboard shortcut is easy to remember: 'b' is for brush (custom brush, that is) 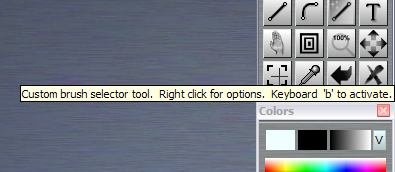 Use
the Custom brush pickup tool, or press 'b' Use
the Custom brush pickup tool, or press 'b'You will see a crosshair cursor which lets you start the pickiup selection process. For example, left-click-and-hold and drag from the upper left area of the desired image portion.
Then let go of the mouse when the rubberband rectangle box contains the desired image portion. This will pick up the selected portion of your image into a new custom brush. (the active custom brush)  You should want to store a safe copy of it: use double-quote (") or seelct the same option from the Brush menu: Brush > Store / manage... 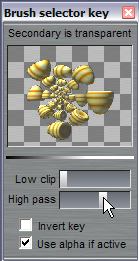 Adjusting the transparent background of the brush : The stored brush image may not show enough transparent on the background color, e.g. if some of the background wasn't the same color exactly as what we picked with the colorpicker when setting the secondary color. Right-click the brush pickup tool, and you'll be able to adjust the low clip and high pass controls to fine tune the levels of transparency. Be sure to store this new brush too. How do they differ? In the following two images you see how the result may differ. If the brush doesn't have full transparent background, then there may be a slight cumulative effect and coloring as you paint with it. In this example, the background color was not full transparent, and had a little bit of blackness left in it. When you paint with it, there will be a gradual, subtle darkening of the parts you paint first, as the additional dabs of paint are deposited over it with non-perfect transparency. It may lead to tinting, or in this case, darkening. 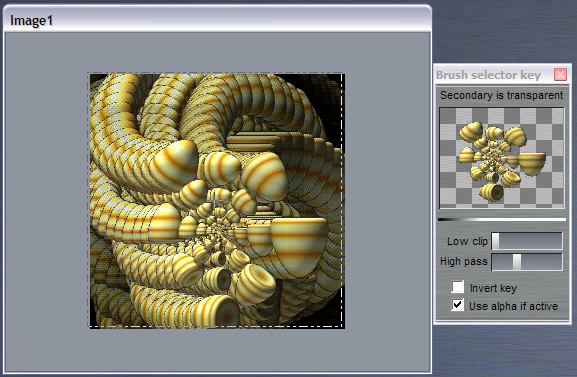 If however the brush contains fully transparent background, the only the opaque portions will be afecting the exsting image. 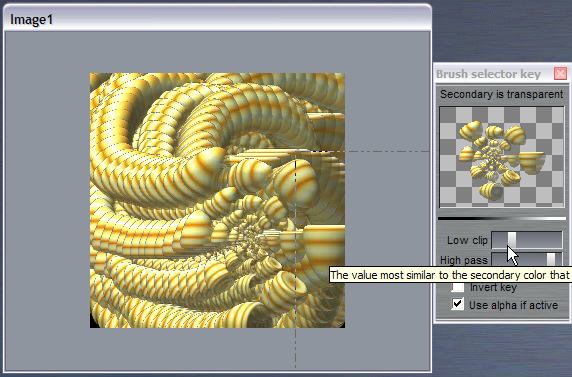 Picking up the whole animation as an animated brush You are now ready to pick up not just a single frame or portion of it, but a whole image sequence of the animation into the custom brush, thus creating a custom animated brush. The trick is to use the ALT key. As you use the brush pickup tool, use the ALT key too. Not when you click the tool. Not even when you start making your selection for the pickup (left-click-and-drag). What matters is that the ALT modifier key be in the pressed down state at the time when you let go of the mouse button at the end of your selection. So, to summarize, do this: - select the brush pickup tool (or press 'b') - left-click-and-drag to start the selection (e.g in upper left corner of desired selection) - drag towards the lower right corner of the selection - press and hold the ALT key, and... - release the mouse button when the selection rectangle is as you want it, with the ALT key still down You will see the program go through all frames of the animation, from the current frame to the last one, as it's grabbing them into the custom brush (or parts thereof,, if the rectangle of your selection didn't contain the whole image dimensions) If you don't see it 'animate' through the images, perhaps you were not positioned on the first frame of the animation. Indeed, it runs from the current frame only, not from the first frame of the animation. If you have for example a 20-frame animation and want to select and pickup only the last 10 frames, position the frame counter onn the animation toolbar to show frame #10. Your custom animated brush would then be made of frames 10 through 19. If you have a lenthy animation, say of 50 frames, and you only want to pick up frames 20 through 40, then you can either cut the blocks of unwanted frames before and after the desired range, i.e. before you pickup the remaining desired frames. Or, you can select from the first desired frame to the end, and store the custom brush, where you can further manage and display the frames as a filmstrip, and delete frames at the tail end of it, frame by frame, until it contains the desired remaining frames. Examples: painting with animated Poser characters |
| many more free tutorials from PD 2.1 and higher |
Inventory Blowout
Sale: Poser 6 (boxed!) at lowest prices: for MacOs or Windows |
Time
for a Break! Halo 2 for PC |
Stop unknown threats before they stop you! NOD 32 - best antivirus, by ESET |