
Animated(!) Lens Flares
new with PD Pro 4.1
You can render these on top of any current animation, and use keyframes to track the position of a moving object in that clip, such as a bright light representing the Sun. Like in this simulated sun rise, done entirely in PD Pro:
press 'Play' to view animation
Here's a basic overview of some of the new tools offered in the new lens flare engine since v4.1 of PD Pro:
 If you work on a still image, you
will find the Lens Flare tool as usual and as expected in the Linear
tool on the general Tools panel. (same group that also has the
Lightning, Linear Alpha fader and Linear or circular gradient tools)
If you work on a still image, you
will find the Lens Flare tool as usual and as expected in the Linear
tool on the general Tools panel. (same group that also has the
Lightning, Linear Alpha fader and Linear or circular gradient tools)If however you work on an animation, launch the Timeline editor from the Animation menu.
Scroll to the bottom of the filters list to locate the Animated group of filters and find the new Lens flare option there.
| into 3D: draw
a shape, and see it automatically turn it into 3D Archipelis Designer cool tool for rapid 3D model creation and prototyping from images |
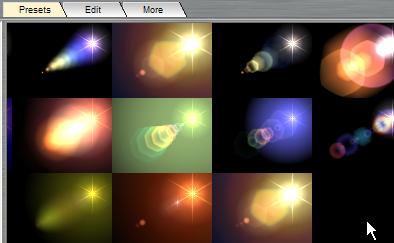
You'll see a floating window with a preview of the current lensflare setting. There's also a number of great presets to choose from.
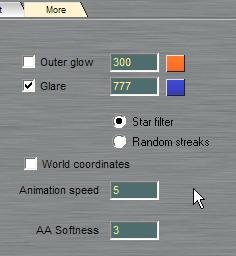
The 'More' tab shows additional options for random streaks, color of an optional outer glow, the speed of animating some of the components of the lens flare, anti-aliasing quality, etc...
The Edit tab shows the familiar table of parameters. Well, it's familiar to those who have used the prior version of the lens flare engine.
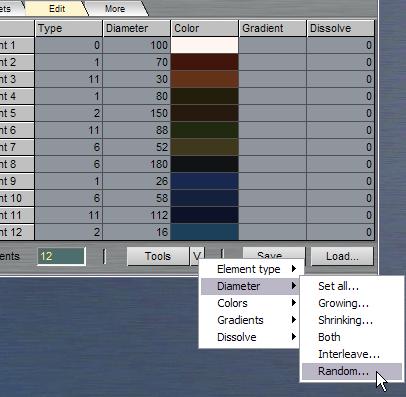
Notice the many additional features at the bottom, like the Tools menu. It opens a whole universe of additional features and options to accurately fine-tune your lens flare's apearance. And of course you can also save your new settings or load another preset from file, a DLF file (Dogwaffle Lens Flare), ending in .df
|
still
one of the best, now also very affordable! Poser5 Powerful 3D for stunning human figures, creatures and other 2-legged monsters :-)
Don't know how to use Poser? Get the VTC Tutorials! |
|
PD
Particles - $19
A fun companion for your digital photo image editor! powered by Project Dogwaffle  |

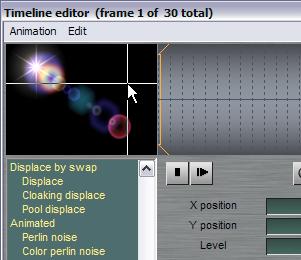
In the Timeline editor portion, you'll see the position of the flare's hotspot, as well as a 'Level' parameter. It controls the size and intensity and other aspects. If it is too small a value, you may not see the flare's effect in the preview.
Remember therefore to increase the Level a notch.
Still in the Timeline editor, you can set the position of the flare's hotspot in the preview window directly. Here we're placing it in the upper-right quadrant.
| Bryce
5.5 Original price: $99.95  |
In order to make it move in an animation from one place to another, we'll use two or more keyframes.
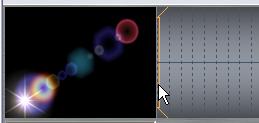 Make sure that the first frame of the background animation
is selected. Notice that this backgrund is simply a black background,
but it could be whatever pre-existing animation, perhaps something
loaded from a clip that you recorded on a cell phone or a digital video
camera.
 parallels desktop for Mac   redefining the meaning of window-shopping on a Mac |
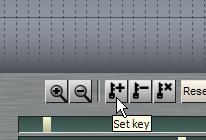
Select a different frame on the timeline, change the position of the flare and set another key.


Then click 'Render' to have the moving lensflare rendered into each frame of your animation.

| Getting
started with Digital Art on a tight budget?  PD Artist - only $39 Draw, Sketch, Animate & Paint powered by Project Dogwaffle |
You can click 'Stop' and 'then 'Undo' if you notice something isn't the way you wanted it.

| New v1.5 Fast 3D sketching, colormap, bumpmap and displacement map painting and digital & sculpting: Curvy 3D the fun & intuitive way to sculpt!  ...it's not modeling, it's better: It's liberal sculpting! Great for Fantasy Art, Concept Art & 3D Design, making 3D props, ... Special discount coupons available for users of Project Dogwaffle! (ask us) |

For Example, you might have wanted the size of the flare to change. You can select the 2nd keyframe, marked near the middle of the timeline with a small red tickmark along the top.
After rendering again, you can scrub through the Animation toolbar to view the sequence of frames it generated.

| Do you like PD Particles? then you'll LOVE PD Pro!  see what's new in v3.5 and free update patches even better: Check out what's new in v4! |
That's it. The only thing that needs to be added now is your imagination.
| Bryce
5 boxed version only $25 (!)  use it to Upgrade and Save! |
Here's an example where we added the lens flare animation over the moving skies/clouds animation.
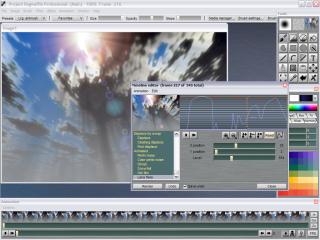
Click image for fullscreen view
Notice how the timeline has quite a number of keyframes set, to cause the flares to turn brighter or dimmer as the clouds move away or in front of the Sun.
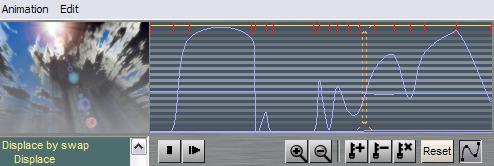
You can see the resulting changes in brightness and size of the reflections and flare in the animation:
| Serious
tools for aspiring Game Developers: 3impact a complete physics-enabled game engine!  - fabulous physics - - awesome visual fx - - powerful & easy to learn - - easy & royalty-free - only $99 Make games that make an impact - with 3impact! Use it with your own 3D scene creation and modeling tools! |
