|
| Products | Features | Sales | What's New | Download | Support | Tutorials | Newsletter | DOTM | About | ||||||
|
||||||
More Landscape tutorials | even more tutorials |
||||||
Here's an elevation map (also known as height map): it's a grey-scale image. If you use your own, it can be grey-scale or even colored, and the system will interpret it as elevation, based on the brightness of the pixels.
You also see a colored version, next to it. That one can to be used as a texture map, or color map. Load it in the Swap image.. Keep the grey-scale image as the Main image.
(feel free to click and download the larger version to play and experiment)
The texture map can easily be created, starting from the elevation map: Dogwaffle has a few tools to colorize it based on the elevation, and based on the slope too (how quickly the elevation changes, along steep hills and walls). You can find the "slope shader" in the filter category: Filter > Stylize. It has options - explore them.
A similar tool is also integrated in the filter: Filter > Transform > 3D Designer (click the 'More' button for the extra features). The 3D Designer adds erosion and sediments too.
Erosion can also be added, carving out gullies. Find it in the 3D Designer or the Style > Erosion filter.
Once you have an erosion map, subtract it from the height map. Or add a small amount of blur first, to 'widen' the eroded tracks. Or invert it so it appears black on wite, then multiply it to the height. If the erosion is too strong, use the interactive undo to adjust the amount of the last step.
You can add a lo of filters to both the height map and the texture map in order to create various other effects. We'll explore some later.
For now enjoy a few renderings, done with Puppy Ray GPU:
Filter > Transform > Puppy Ray > Puppy Ray GPU
First Steps
Ok, here we have loaded the above-mentioned grey scale image of the height map. We will not even bother loading the texture map into the Swap. Let's do this the easiest way first.
Here's what it may look like at first: the water plane may be seen, but not transparent with refraction. Also, some parts are dark because they are not exposed to the Sun and the Global illumination is not enabled by default.
Time to get busy. Enable global illumination, and click Render. (some actions will auto-re-render).
Click More... and turn Water plane > Refract on (in the Render tab)
Now it's more like this:
Next, in Bump map menu, use one of the preset bumps like Rocky or such.
Use the icons below the preview to select moving or turning the camera and locate the Sun which is likely to the left. Make the Sun size bigger too, around 100-200, and move it down lower.
Try other skies too, and lower the ray step. Try Riverbed for Bump, and explore some of the other parameters like Fog Level.
Here's another stage after a few tweaks:
How to Work Faster on a Slow GPU
While you experiment with the many options and find the perfect parameters that you want to use for your final render, you might want to work faster by temporarily disabling the Antialiasing, or reducing the number of AA passes (AA = Anti-Aliasing). This will especially be useful if you make changes in the preview area to turn the camera or move the world or camera position and change the angular aperture. It will also help when using any slider values which tend to generate more than one refresh event as you scrub through them.
Another option that you can easily and quickly disable/re-enable with a click (to reduce intermediate rendering times or to discover another style you might like too) is Calculate Shadows
The Raystep value also has a big impact on rendering time. Make it a higher value temporarily. It will loose fine details but you can see those in your final rendering when you go with lower values.
Of course you can also just work with the preset quality menu options.
More Water options
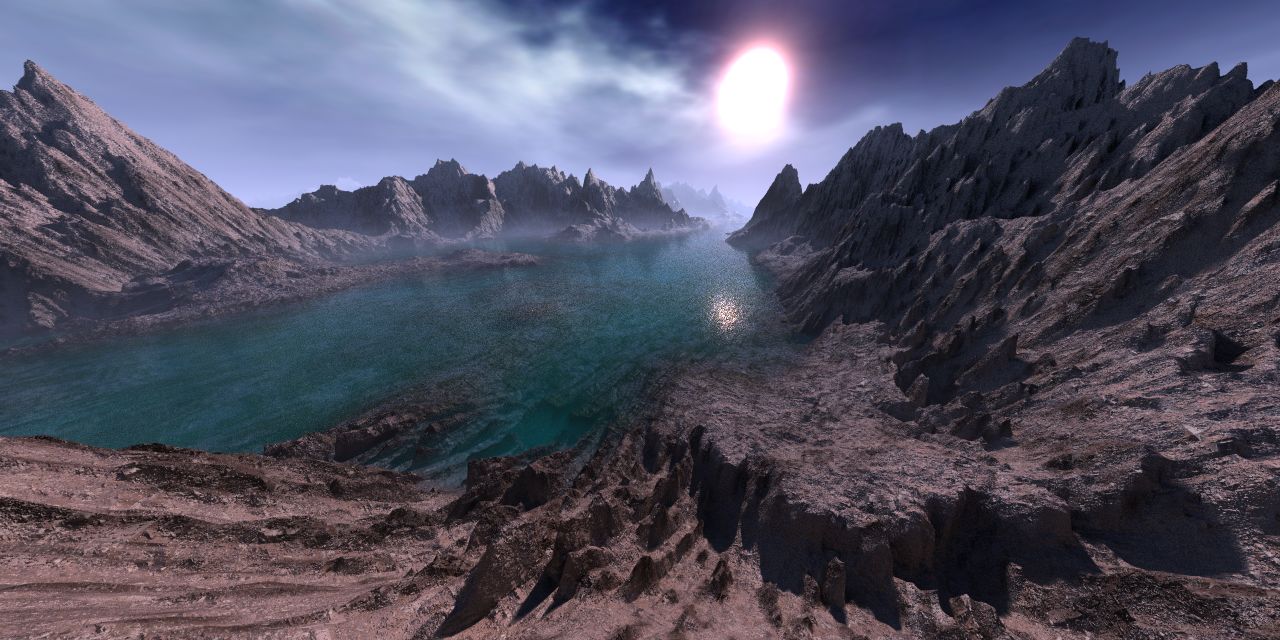
In the "World" tab of the Puppy Ray interface, try also the extra parameters for Water, suchas Absorption (attenuation), Scattering (Dispersion), Caustics, and Ground Fog.
Here's a rendering you could easily achieve that way:
Going Beyond
Do you want the water more murky, less transparent? More agitated? producing stronger caustics? a lot of posibilities to further explore. And don't forget that you can also use this not as the final render or production. It could be subject to further post work, with filters, and of course with painting, brush strokes using the particle brushes and foliage brushes.
Have fun! And don't forget to step away from the PC every once in a while, to take a walk outside and enjoy the real thing too :-)