

PD
Particles for
Cinema 4D GO
part 2 - painting the foliage with PD Particles
Cinema 4D GO
part 2 - painting the foliage with PD Particles
| More Tutorials |
| PD
Particles |
| PD Artist |
| PD Pro |
| TheBest3D.com |
disclaimer: trademarks are the property of their respective owners and are only used for identification purposes. No endorsement of any sort is suggested.
 |
Start PD Particles. It
will ask if you want to load an image from the Clipboard or a file, or
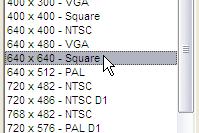
simply create a new one. Create a new one from a blank, i.e. from scratch. Select the size. Perhaps a square shape? This may depend on what shapes you're going to paint - tall vertical palm trees? or low bushes and tufts that fit more easily in a square bounding box without too much wasted, unused space? |
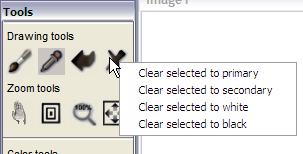 |
We'll paint over a black
background. Right-click on the big 'X' tool, which is the Erase tool in the top row of the drawing tools, next to the back-arrow (undo icon). |
 |
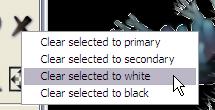
Clear the selected to black. By default, all is selected. Also, the default primary color is not exactly black, so don't just clear to the primary color if you want it totally black, i.e. R, G and B channels at 0 each. |
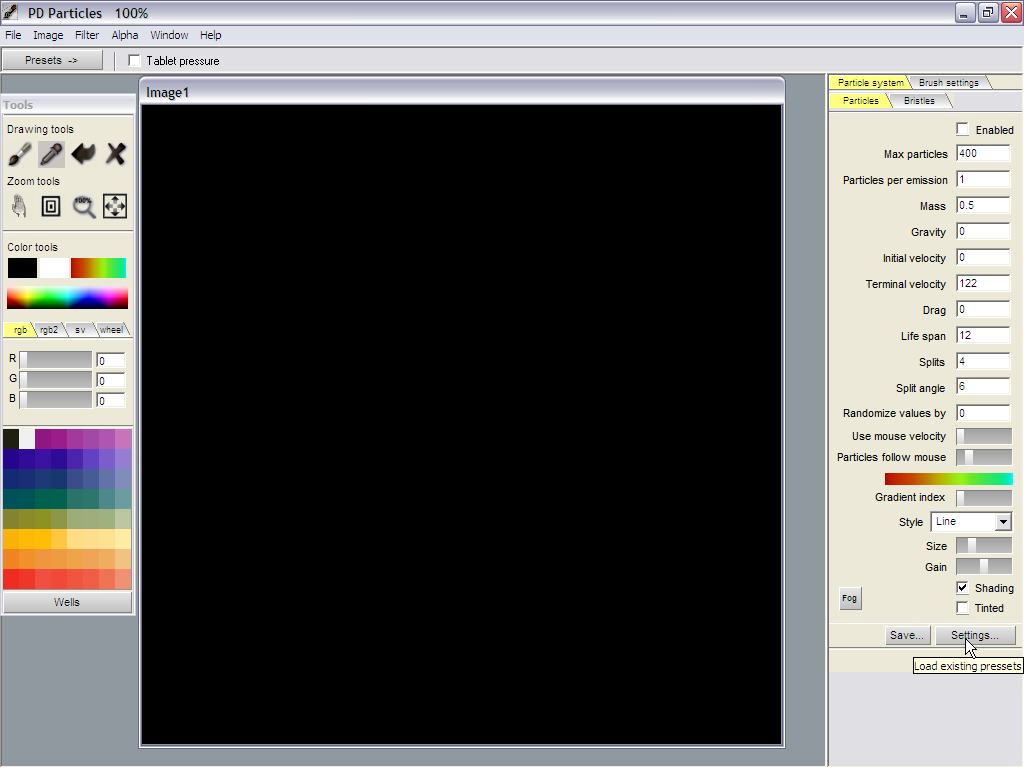 |
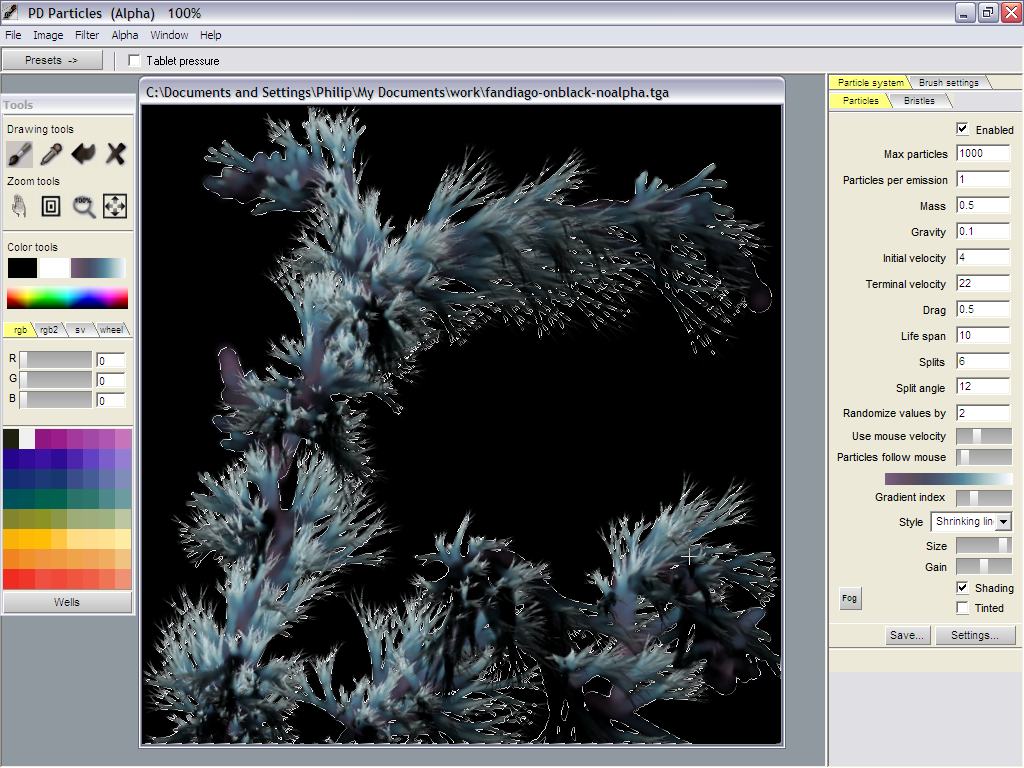
Let's select one of the
preset brushes, such as the one named 'Fandiago' from the particle
Settings. In the lower-right corner, click the Settings... button. <<click image for large screenshot |
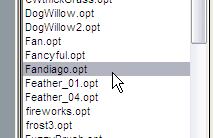 |
Scroll through the list of
presets. The files are ending in ".opt", they are files for the
Optipustics particle system of Project Dogwaffle. They are actually
clear text files which you can edit in Notepad if you're curious. PD
Particles keeps them in a subfolder named 'Particles': C:\Program Files\PD
Particles\Particles
|
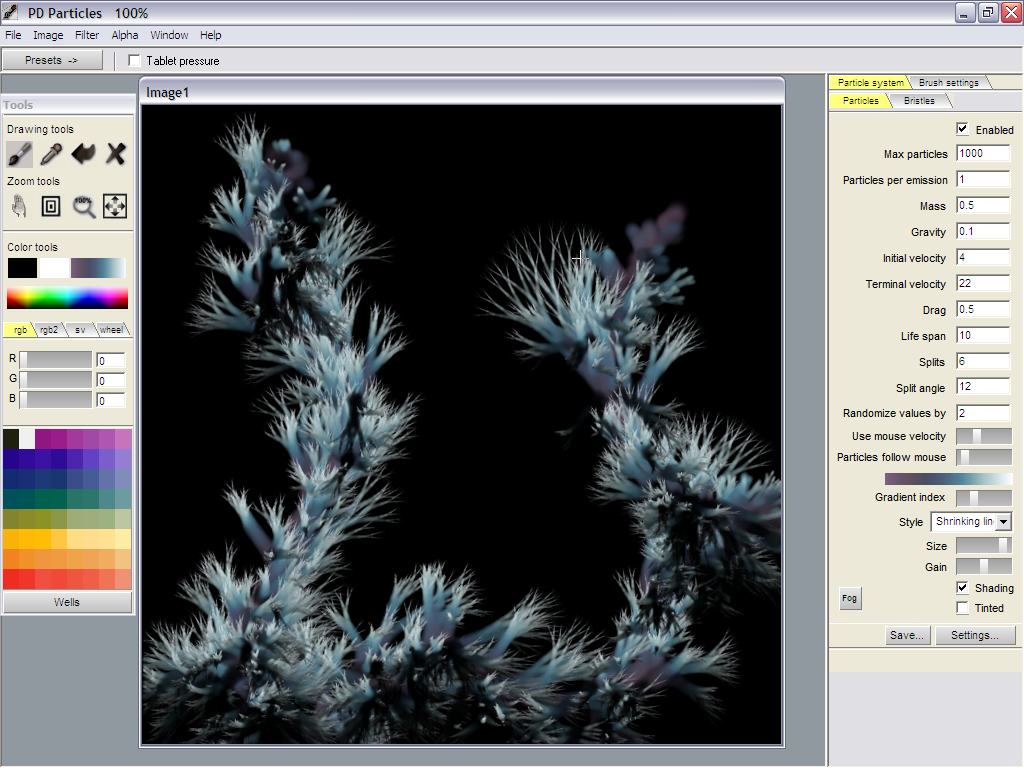 |
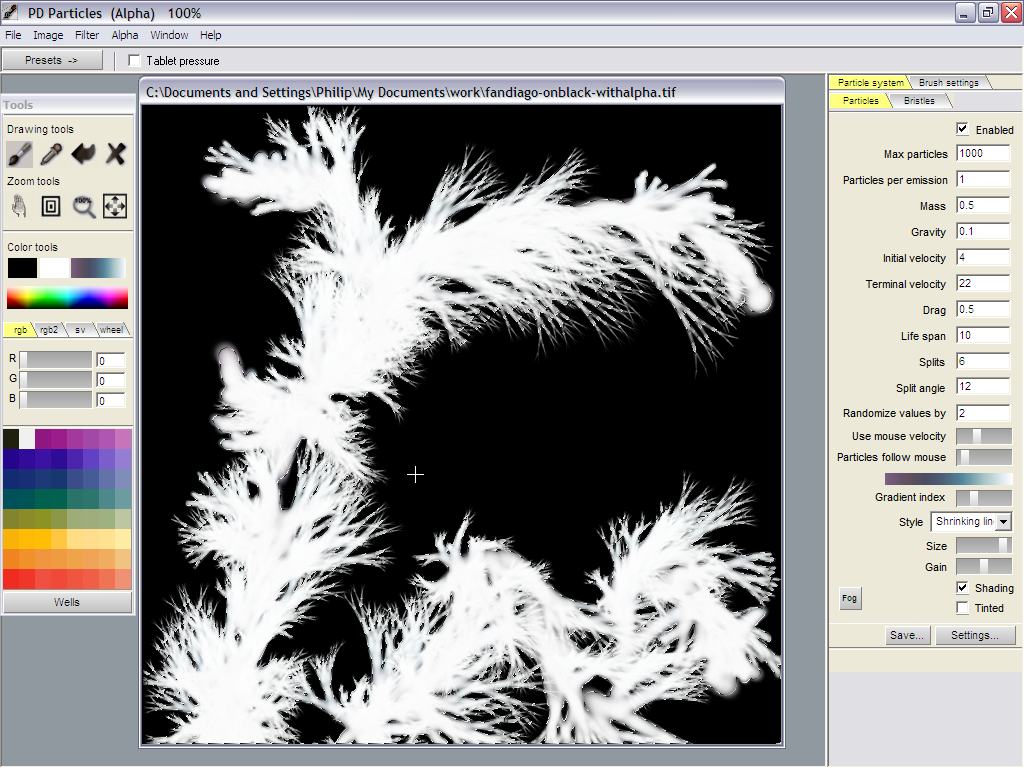
After just a few brush
strokes, we're done painting. |
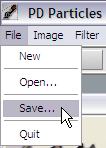 |
We can save this. But
we'll probably need to get back to this in order to also generate the
transparency mask as an alpha channel. Still, let's save this one. In fact, we may need to save the colors separately from the alpha channel, if your 3D program doesn't know how to make use of the embeded alpha channel in a single file |
 |
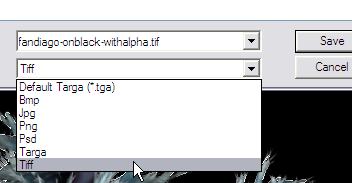
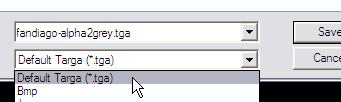
Save it to the format
called 'Default Targa (*.tga)'. |
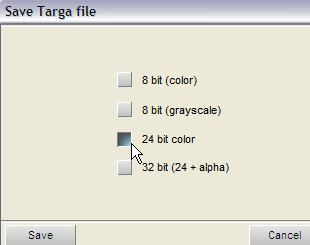 |
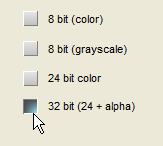
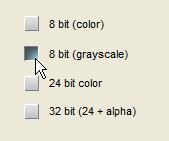
This Default Targa format
will ask if you want to save it in a pixel depth that can hold the
alpha channel too (32-bit) or only the colors. There are also options
for 8-bit color or greyscale. The other formats such as Tiff, Bmp and Png would save to the pixel depth needed based on whether PD Particles detects the presence of an alpha channel, so it is more automatic. Cinema 4D can easily use the Targa file format, so it is recommended use the Default Targa format which gives the right options, but if for any reason your version doesn't work with that or you use another software that doesn't feel free to try the other formats too. Some will work better than others. Tiff is commonly used in Cinema 4D GO as well, and Windows can show the thumbnails in Thumbs view mode, which presents an advantage for using Tiff. The good thing is that there is a Windows Explorer extension available that adds the capability to display thumbnails of Targa files too. See it in the 3rdparty plugins section of Project Dogwaffle. It's called Thumb Plud TGA by Greggman. |
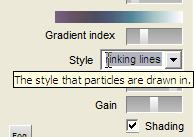 |
Enabling Alpha on-the-fly Ok, how do we make sure that the opacity mask is created in the Alpha channel automatically while painting with particle brushes? Look at the current settings for particles: There is a menu labeled 'Style' The style used by the Fandiago preset is shrinking lines. |
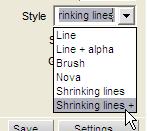 |
Click the Style menu and
change it to the next value, "Shrinking lines +", which is to say +
alpha. If it had been 'Line' initially, you could change it to "Line + alpha" |
 |
Now, as you paint a brush
stroke, the particles are drawing as before for RGB color, but they
also are setting the opacity value in the alpha channel for the pixels
that they affect in color. << click for full screenshot Here's a replay of that painting activity: |
 |
You may want to use a
different file name when saving this one: make it clear that this file
contains alpha. |
 |
And of course be sure to
save it to 32-bit depth if using the Default Targa format. |
 |
If using Tiff or similar, a 32-bit depth would automatically be selected now because it sees the presence of the alpha channel. |
 |
Creating a Greyscale Image of the Alpha
Channel If your 3D or imaging program can't directly use the alpha channel as a transparency mask, then you could create a separate image file from a greyscale conversion of the alpha channel. With the alpha channel still present, simply clear the selection to white. |
 |
The painted image thus is
erased to white. Along the thin branches and twiggs, due to the
transition in alpha from fully selected to unselected, which acts as a
weight factor for how much drawing or erasing to apply, you will see
various shades of grey. The area outside of the foliage, i.e. in the
background, will remain totally black. |
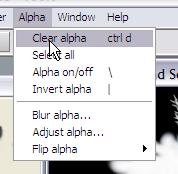 |
We don't need the alpha
channel anymore at this time, so clear it. A common keyboard shortcut can be used: Control-D |
 |
Verifying the greyscale range It is important to make sure that the values range from fully transparent to fully opaque. Or, in terms of the greyscale image, from totally black (rgb=0,0,0) to totally white (rgb=255,255,255) Use the color picker, also known as the turkey baster. |
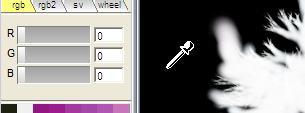 |
Pick a color in the area
of the background. It should show the RGB sliders going to zero, fuklly
transparent. |
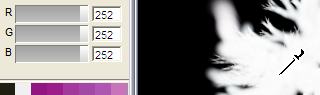 |
The inside of the foliage
may look white but it may be slightly off. This would mean it might be
slightly off fully opaque, and show a slight amount of coloring from
background items in the 3D scene when rendered. There can be various reasons for this. In our example we see 252 as the brightest values for RGB, instead of 255. This can be fixed by adjusting the 'value' in the filters. |
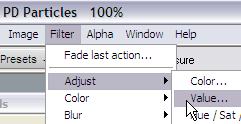 |
Adjusting the Value Select the Value... filter from the menu: Filter > Adjust > Value... |
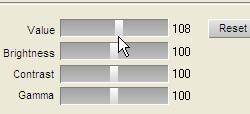 |
Slightly increase the
value. This will 'scale' the range. The minimum value at 0 stays there,
thus it won't affect the black pixels, which is just as desired.
We just want the brightest values to reach the top at 255. |
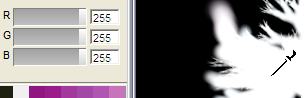 |
Click OK and check the new
values with the color picker. Sure enough, now we can see values
peaking at 255 for R, G and B |
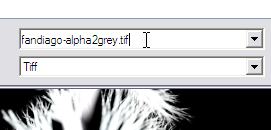 |
When you're done be sure
to save it and to give it a name that will clearly identiy it as
containing a greyscale image, regardless of whether you'll save it as
Targa in 8-bit depth or others in 24-bit depths. |
 |
If you do choose the default Targa format, you'll have indeed the option to save it as an 8-bt greyscale, or as before in 24 bit depth. |
 |
|
| This almost completes the
painting part. We're pretty much ready now to load
these images into the color channels and transparency channels of a
shader in Cinema 4D. |
|
|
part 1 - part 2 - part 3 |
|