

Multiple Layered
Styles
| More Tutorials |
Intro
Video amongst
PWS's Facebook Videos Now also on YouTube |
| Finally! 3D for
everyone: Carrara (boxed) free shipping for orders $50 and up! (US only) Hurry before they're gone - this is a limited inventory blowout sale around $17 Carrara 3D Basics: so affordable!  around $40-$50 Carrara 3D Express: wow!  around $50-$60 Carrara 5 Standard: best value!  just around $100 Carrara 5 Pro: be a 3D Pro now!  |
| Fast
3D sketching, colormap, bumpmap and displacement
map painting and
digital & sculpting: Curvy 3D the fun & intuitive way to sculpt!  ...it's not modeling, it's better: It's liberal sculpting! Great for Fantasy Art, Concept Art & 3D Design, making 3D props, ... Special discount coupons available for users of Project Dogwaffle! (ask us) |
from
2D to 3D in just seconds! Just trace an outline and see it automagically turn into fully textured 3D shapes for Second Life, Google Sketchup / Google Earth, Direct X & Games, Wavefront OBJ and other popular 3D file formats! Archipelis Designer  New! now also for Mac! |
Inventory
Blowout
Sale: Poser 6 (boxed!) at lowest prices: for MacOs or Windows |
Time
for a Break! Halo 2 for PC |
Windows
7 on sale |
|
As soon as you've dropped the style above the default layer, a new layer is created. The Style layers area now shows the original Default Layer at the bottom, and a newly added layer above it, named after the style you dropped there: Dark Chalk with Pencil. 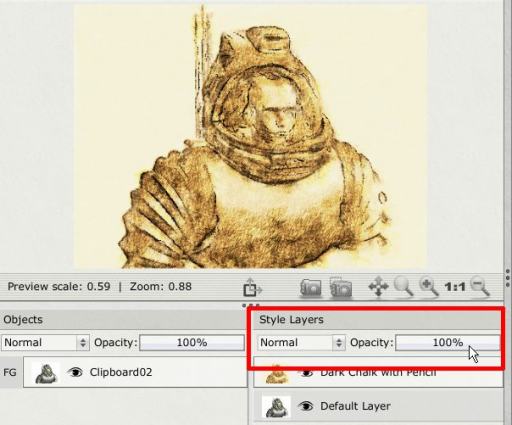 Two parameters also are shown, for the selected layer:
Try for example reducing the opacity. Place the cursor inside the value box showing the 100% opacity. It is a slider that you can drag and adjust sideways.  With this you can adjust the dominance of this layer, perhaps to allow some of the lower image's layer to show through as well. It can get you a nice blended mix of both styles. The prior example shows it at 85% opacity. Next, below, you see it's effect with 65% opacity. The scope of the chalk and pencil style is clearly reduced, as you're starting to regain some of the reflective/metallic original 3D rendered look. 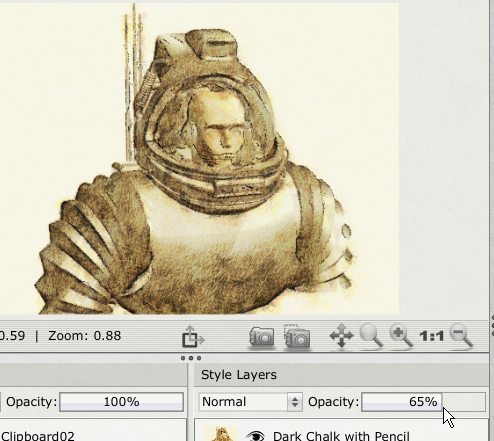 Here it is a 42% opacity: 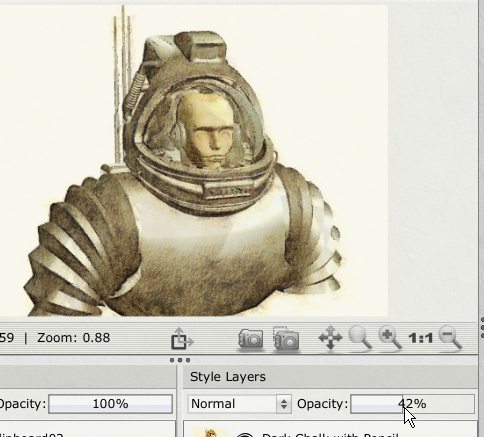  Finally, there's also that other layer control parameter: the layer's blending mode. The default is set to 'Normal', which means that the layer acts as an opaque color replacer (still subject of course to what the opacity value says). Notice the many possible values in this menu.  |
|
|
| More Tutorials |