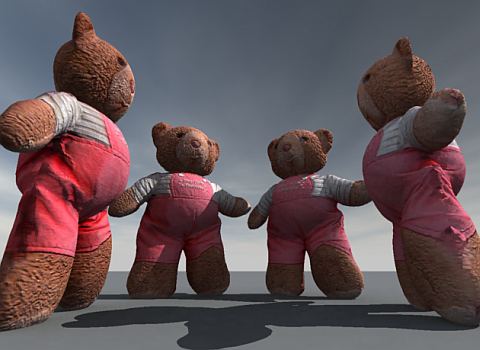
Teddy
Bear
turn an image into a 3D model... in a few minutes
turn an image into a 3D model... in a few minutes
| free!
teddybear model in Wavefront OBJ and DirectX .x format with supporting texture file: teddybear.zip size: 3.17 MB (3,331,152 bytes) |
 |
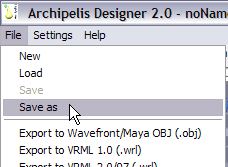
Saving your Archipelis 3D model
It's time to save. In fact you should have saved often, way before this. But wanyway, let's save this final version.
Select menu: File > Save As...
If you like PD Particles then you'll LOVE
PD Pro see what's new in v3.5 and free update patches even better, check: what's new in v4.1? |
parallels desktop for Mac   redefining the meaning of window-shopping on a Mac |
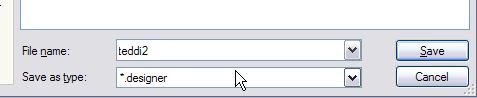
The file type will be .designer. Enter your desired filename and click Save.
Here's a view with two saved models.

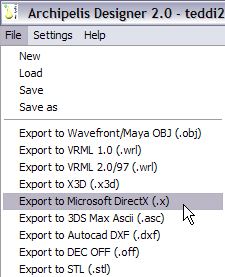
Exporting to other formats
This is very important: before exporting to any other format, be sure to save as archipelis native file. Any of the exports you make thereafter will go automatically to the same folder and ith the same pase filename. The only thing that will happen in addtion is that the additional file(s) and support file(s), if any, will be saved there in the same folder too.
Now try the export to Wavefront OBJ format, which can be used in many applications for 3D.

When using Wavefront OBJ as export format, you can use this 3D model in a vast variety of other programs. You may need to reconstruct the shader in some cases. For example, Carrara's importer for OBJ doesn't seem to build a shader with the texture, so the model nitially loads a dull grey, but you can easily change that. Just select the color channel to be of type Texture and select the appropriate texture image file.
| Shop
at Purplus for more great Software & gadgets, games, security tools and productivity solutions at lowest prices! |
Another great format is the DirectX format, for use in Games and many other 3D tools (including Carrara Pro 6)
What's particularly cool is that when importing this into Carrara, it already has the shader info with the texture map on it. Carrara 6 Pro's .x importer is good enough to recognize which texture to apply to the model and use the uv addresses as supplied.
| Finally! 3D for everyone: Carrara (boxed) free shipping for orders $50 and up! (US only) Hurry before they're gone - this is a limited inventory blowout sale around $17 Carrara 3D Basics: so affordable!  around $40-$50 Carrara 3D Express: wow!  around $50-$60 Carrara 5 Standard: best value!  just around $100 Carrara 5 Pro: be a 3D Pro now!  |
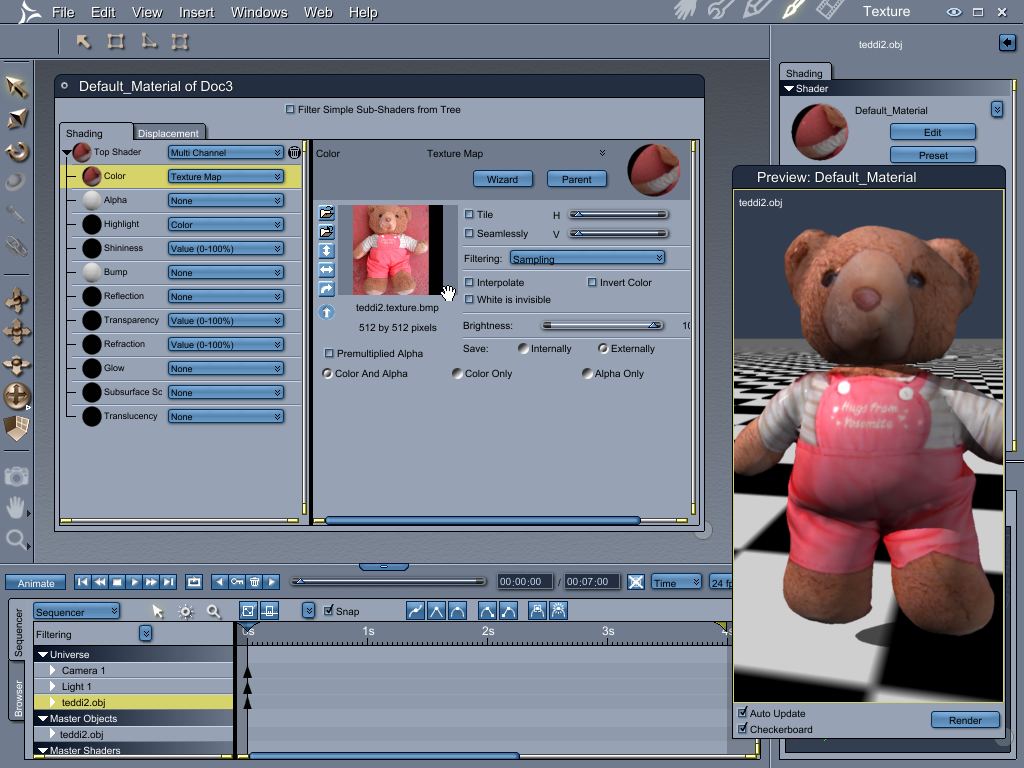
Edit the shader and change the color channel from a plain color to type 'Texture'. Then browse to the texture map. In no time you'll have the color teddybear again.
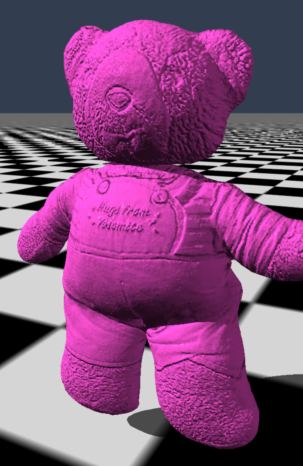
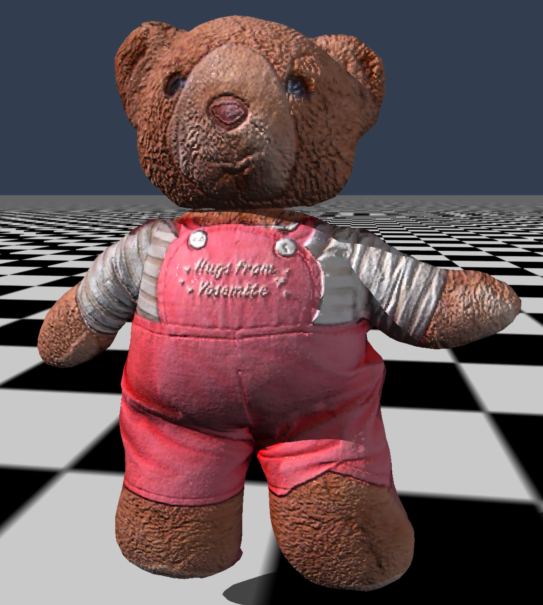
If may look a little flat though. Bump mapping would help a lot.
Use the same channel of color in the color channel again but now in the bump channel. You can use Control-drag-and-drop if you want to duplicate the channel into bump.
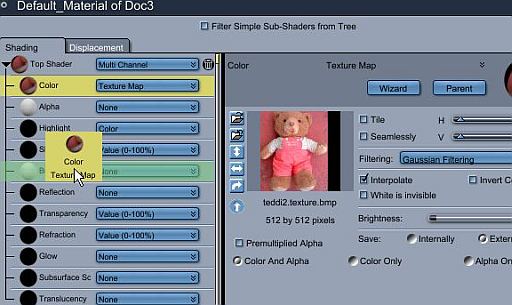
Or just a regular drag and drop to remove the texture from the color channel if you want it only in the bump channel.
...for effects like these.
Inventory Blowout
Sale: Poser 6 (boxed!) at lowest prices: for MacOs or Windows |
| a great companion to
Project Dogwaffle: AnimeStudio is on sale!  Regular price: $59.95 (boxed!) |