

Working with Base Colour Maps
 |
| Getting
started with Digital Painting on a slim budget:  PD Artist now 19! Draw, Sketch, Animate & Paint powered by Project Dogwaffle
|

 |
Working with Base Colour Maps
 Now you can click the 'Base Colour' thumbnail and make it the currentmap. There will be a popup of select pre-existing and available txture maps. Select for example the grey colored one. Maps are typically sized as powers of 2, i.e. 256x256, 512x512, or even larger. Curvy 3D recognizes 4 different types of texture maps, per each object:
 Note that some of these have a slider to adjust the intensity with which they're applied. The Curvy map even has two sliders, one for intensity, and a second for smoothing. Let's explore. Loading a texture map from an image file Instead of using a preloaded image by left-clicking the thumbnail, you can right-click the thumbnail to open a dialog box. You can then navigate to a folder with your own images, or by default those included with the Curvy installation. 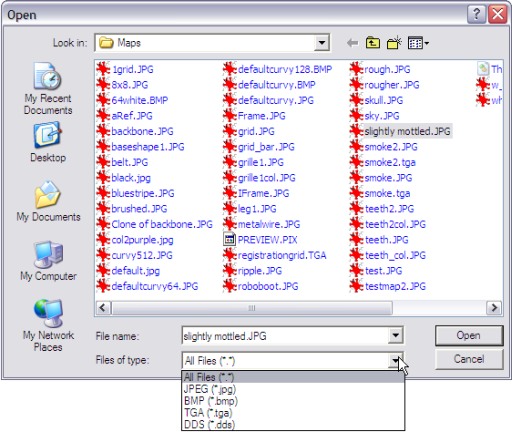 The images can be in several standard formats. Here's one named 'slightly mottled'. It is also seen in the built-in presets. After loading it into the Colour map, your view might look like this:  The left side shows the Base Colour's image, the Perspective view on the right side shows what it does to the sphere. It's a good idea to switch to a thumbnail view mode when browsing through your images. Here we select a low-resolution image named IFrame.JPG  The Base Colour view now shows the newly loaded image. The cell patterns are also seen in the Perspective view to the right now:  Next: Discovering Bump Mapping |
| Spheres
Tutorials |
| Drawing
a Sphere |
| Base
Color Maps |
| Bump
Maps |
| Displacement
Maps |
| Beginner
Tutorials |
| Photoshop 3D Layers |
| Bones
101 |
| Teapot |
| Dogwaffle 101 |
| Teapot Confetti |
| Renaming &
Grouping |
| Booleans |
| Web Graphics |
| Smooth |
| Monkeyfaces |
| Straight Lines |
 |