

Post Work with Project Dogwaffle
Using PD Pro Digital Painter (Project Dogwaffle 3) for post work to add special FX to rendered 3D animations.
more_examples...
Home of Dogwaffle
Introduction
|
|||
You'll notice of course that the
above clip is in Quicktime format. Project Dogwaffle can handle image
sequences and AVI files, so we'll need to convert the Quicktime to
either of these formats. We used the very affordably priced Quicktime
Pro to convert the clip to an AVI file. Uncompressed we saved it to
TrueColor (24-bit per pixel) format. Don't save it to the default
TrueColor+, because it will otherwise have an opaque alpha layer over
it. If you don't have the tools to convert the Quicktime version to
AVI, grab one of them here below:
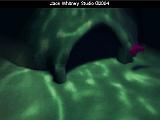
When you view the movie, you'll also notice that there are two distinct parts in the movie. We'll nickname them "the Cave" and "the Jump".
In the following tutorials we will show how to
Other tools that you might want to use in conjunction with such operations are Irfanview, VirtualDub, Debugmode Wax (awesome!), AVIsynth and other great tools for video composition. These and many other tools are listed in our Links section.
For example, one thing we'll attempt is to add a bit of rising air bubble action. Or, some turbulence when swinging the arms and jumping,and more bubbles which follow the jumping character as it swims away, or additional camera action like pan and zoom to focus on particular item of interest such as the little fish peeking into the cave. We can also think of adding nopise, old film look, mystic vision, light diffusion, motion blur and much much more. Much (but not all) of the work will be done through applying filters with the Timeline editor.
Preview of Special FX
|
Original swampdog File, converted to
AVI
(compression codec: Cinepak): Zipped version: swampdog_avi.zip 1.95 MB (2,045,469
bytes)
Iceows'd version: swampdog_avi.ice 1.79 MB - 1,879,784 bytes) |
When you view the movie, you'll also notice that there are two distinct parts in the movie. We'll nickname them "the Cave" and "the Jump".
  |
In the following tutorials we will show how to
1. separate the Cave from the
Jump back into two separate clips, using the editing tools of PD Pro
2. load a clip and apply a variety of special effects on it
2. load a clip and apply a variety of special effects on it
Other tools that you might want to use in conjunction with such operations are Irfanview, VirtualDub, Debugmode Wax (awesome!), AVIsynth and other great tools for video composition. These and many other tools are listed in our Links section.
For example, one thing we'll attempt is to add a bit of rising air bubble action. Or, some turbulence when swinging the arms and jumping,and more bubbles which follow the jumping character as it swims away, or additional camera action like pan and zoom to focus on particular item of interest such as the little fish peeking into the cave. We can also think of adding nopise, old film look, mystic vision, light diffusion, motion blur and much much more. Much (but not all) of the work will be done through applying filters with the Timeline editor.
Preview of Special FX
click the movies to
toggle on/off
Flash MX player 6 or better recommended
Flash MX player 6 or better recommended
