Making
Textures with
Project Dogwaffle
for use in 3D Rendering & Animation
for use in 3D Rendering & Animation
We'll use a different approach now for making new textures: modify existing ones.
The Podium
For example, select the podium, then open the material editor.


click to enlarge >>>

What we are doing now is essentially to transfer a copy of the image from TrueSpace into Dogwaffle, through the Clipboard, without saving the image to file.
Use the PrintScreen key on your keyboard. Windows will grab a copy of the screen image and copy it to the Clipboard.
Brush > Clipboard > Paste from Clipboard

We can now paint with that brush, or just use a single click on the main buffer to stomp the brush there. Make sure the opacity slider is at the maximum value. (Opacity slider in Tools panel)

You can use the rectangular selection tool (second row of mini icons from top, second icon from left)

menu: Alpha > Invert Alpha
and then clear the selected area to white by right-clicking on the erase icon and selecting the corresponding option.
click to enlarge >>>
We should now have the desired
texture, surrounded by some amount of white space depending on the
specifics of the texture and how big the main buffer was relative to
the brush etc...
When done, be sure to clear the Alpha (from the Alpha menu).
When done, be sure to clear the Alpha (from the Alpha menu).


Magic Wand Selection
We can use the Magic Wand selection tool to select and eliminate the whitespace around the texture. Click the magic wand tool. Then click on the white border area in the image.


menu: Alpha > Invert alpha

menu: Buffer > Crop to Selection

menu: Buffer > Clear alpha
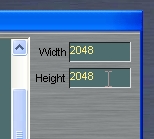
Next we will make the buffer much lager and replicate (tile) the current texture in it several times. We will want to first make the texture seamless.

In v2 there's a tool in the Brush menu to make the image of the brush seamless. (in a recent update patch there's also a new seamless tool that can work from the image in the buffer).
Let's copy the image from the buffer into the brush. By default, the entire buffer is selected, even if no marching ants are showing a selection of the whole buffer.
Use Control+C or the menu item at the top of the Brush menu.


re-open the Gradient tool (shortcut: "p" )
Click the second icon from right in the top row.
click to enlarge >>>

Then click in the main buffer area.
The fill tool will use the image from the current custom brush.
Note that the fill tool also uses the opacity value, set by the slider in the Tools panel. Make sure it's at the maximum value.
click to enlarge >>>

menu: Filter > fade last action

click to enlarge and save
>>>

more: part 1 / top / next: part 3 / part 4 + 5