|
Making
Textures with
Project Dogwaffle
for use
in 3D Rendering & Animation
|
[more tutorials]

|
| Part 3 - Experimenting
with more Filters |
Displacement Tool Magic
Let's create another texture. In
this case we'll learn to use the displacement tools with an image in
the swap buffer to displace another image which is in the main buffer.
There are
some pretty amazing results that can come from this, to make
marble-like and other natural looking rock textures for example.
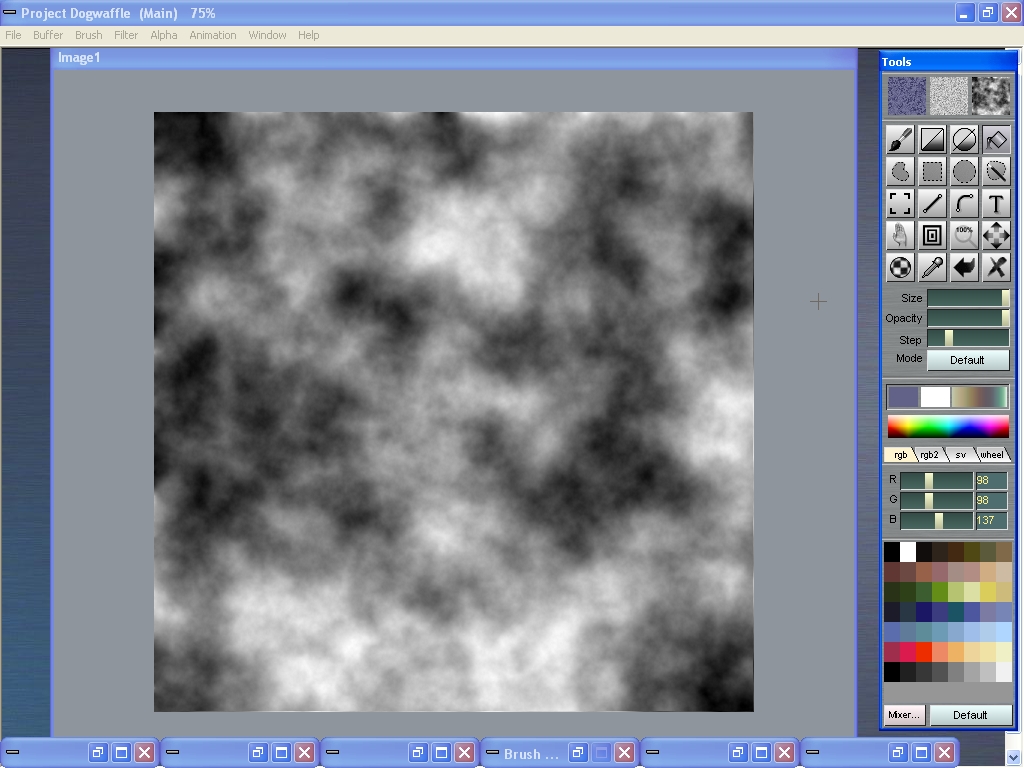
Start from a blank buffer, then go to the Plasma Noise filter
menu: Filter > Render > Plasma noise...
|
 |
Don't use the colored mode.
Use
size 7.
|
 |
The image is in the main buffer
at this time. Jump to the alternate, the Swap buffer - shortcut
"j" to j)ump
|
 |
Repeat the use of the Plasma
noise, but a slightly different size. Use 6 for example.
|
 |
We now
have similar plasma noise images loaded in the Main and the Swap
buffer. Just use 'j' to jump back and forth to compare


(Main and Swap buffers - Click images to enlarge)
|
Let's make sure we're on the
Main buffer now. Then use one of the "Displace by Swap..." tools from
the Filters menu:
menu: Filter > Displace by Swap > Displace
|
 |
As you use the slider, Dogwaffle
uses the pixels from the swap buffer to displace the pixels in the main
buffer. Quickly it starts to look like some kind of marble rocks.
click to enlarge >>>
|
 |
Playing
with Gradients - Colormapping
The next trick will be to map an interesting colormap across the
black-and-white image.
Keyboard shortcut: "p" to open the color gradient panel
Notice that there are several groups of predefined gradient sets
accessible from the 'Gradients' button in the lower right corner of the
gradient tool. Select the Metals or Gun Metals collection, for example.
|
 |
Then use the slider to select
one of the gradients from the current set.
Finally, apply the current gradient to the image:
menu: Filter > Color >
Map to current gradient
click to enlarge >>>
|
 |
Note that there are several ways
to change or make your own gradients. You can 'paint' within the
colored area of the gradient directly to increase/decrease the
progression of the red, green, blue or opacity channels.
You can also drag-and-drop colors from the color palette which are at
the lower right of the Tools panel. Drop the desired color anywhere
along the scale at the bottom of the color area of the gradient. This
will serve as anchors or reference colors placed there.
|
 |
There is a Smooth and an
Auto-Smooth option in the gradient too. This helps if you don't want
color changes to happen all to suddenly.
|
 |
Whenever you're ready with a new
gradient, map it again to the current image.
Or first use "u" to undo the prior color mapping and revert back to the
greyscale original. Then map the new gradient.
|
 |
Another important feature in the
gradient tool is the reverse button, as sometimes the 'interesting'
colors are on the wrong side of the gradient.
|
 |
Sometimes you will want to make
it appear as a fabric or fluffy material of some sort. To that effect,
the Brush Strokes filter can do the right effect.
menu: Filter > Artistic > Brush Strokes...
|
 |
There are tons of options and
combinations to try and experiment with here again.
|
 |
Use the color embossing filter
perhaps to add some relief to it afterwards.
click to enlarge >>>
|
 |
Other
common filters:
the Value adjustments gives access to brightness, gamma, contrast and
value
|
 |
There are several blur filters
like the Gaussian blur.
|
 |
One of the blur tools is the
Light Diffusion. The effect is that bright parts bleed into neighboring
dark parts. This can be an essential tool for added realism on a 3D
rendered image.
|
 |
Another powerful tool is the
Bumby Toy. Instead of starting with the Plasma Noise, try the Bumpy
toy, and see the many options and vast variety of background patterns
you can generate from it.
menu: Filter > Render > Bumpy toy..
.
|
 |
There are options for different
algorithms, iterations, scale and self-displacement in some cases, as
well as using the gradient on-the-fly.
You will likely find this to be a good source for creating a starting
point for fabulous new patterns and textures.
|
 |
Jitter
Displacement. Another one of the displace-by-swap tools
adds a jittery look to the image. It could be of great use when making
tempered glass or steel surfaces like for a Wok. Keep this one in mind,
or the relatedt Jitter noise filter.
click to enlarge >>>
|
 |
This
completes that texture #3
click to enlarge and save
>>>
|
 |
|