|


PD Music?
The Music of Project Dogwaffle
Ok, you've created the perfect 3D or painted visual. Need a perfectly matching mood enhancer?
Just add music:
royalty-free
The post correction option allows you to define a curve, also called an envelope, that modulates and changes the size of the brush along the path of a brush stroke. You don't need a tablet for this effect, a regular mouse is just fine. The post-correction does the magic. Now the post correction can also apply a gradient. Here are some examples:
Post-correcting the size by Envelope curve
Instead of just doing whatever the path of the brush stroke would dictate, an additional step of processing is performed, the post correction step. With this, the brush stroke that you just painted will take a different appearance, as the size of the brush along its painted path is recalculated based on the curve in the post correction panel.
In earlier releases, this feature was only used in the Paint brush tool.
Now it can also apply to the Curve tool.
There is a new icon dedicated to showing the post correction dropdown panel for quick convenient access.
There are also a few presets of post correction curves.
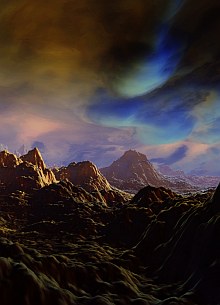
This Meteor started as a curve of several points along a straight line, and post-correction was used to change the size of the brush rendered along it. Then we added various filter efects for glow and light diffusion, and some starry lensflares.
Post-Correction with a Color Gradient
In addition to changing the size along the brush stroke, it is now also possible to use a gradient which will apply color changes along the path.
Some brushes may not use the gradient, as they may contain images with their own colors, but if they're in matte mode and for some internal brushes, you will see a colorful impact for using this gradient feature on post correction.
Here are two more examples. In the first case, we have a custom brush containing multi-color text ("Symmetry"). It is by default not used in Matte mode.
- the first brush stroke along the left side shows the native colors of the image in the brush unmodified, even when we had the gradient enabled on post correction.
- The middle brush stroke is in Matte mode (see (5) on the brush Settings panel's Custom tab). It shows just with the primary color when the gradient is disabled.
- the right-most brush stroke was with Matte mode AND gradient post correction. Now we get the colorful alteration!
Here is one more example, where we combined the envelope curve for changing the size with the gradient for changing the color.
- The hedgehog is an image based custom brush again.
- The first brush stroke at left is from bottom to top and shows the change in size based on the envelope's influence on the size. No change in color, as the gradient does not alter the colors in the image at least not yet in this implementation. (we could imagine a scenario that uses the gradient in multiply mode against the image, or something similar. There's always room for growth and improvement into new features :-)
- We then changed the brush mode to Matte
- The Matte mode's brush stroke reveals the primary color when gradient post correction is disabled.
- With gradient enabled, we see the colors along the path, from bottom to top in this case.
When did this all start?
Here is more info on an earlier release of post correction - Initially released in v10:
The Brush size can be enveloped.It was enabled by some changes in the brush system that added a control of the scale, which in turn also led to enabling a control of the brush size by the underlying swap image. (released in RC26)
There's a post effect for the brush stroke that resizes the brush along the path, with a graph editor to set the progression. Look for it in the View menu. More on this to come soon.
The image below is also in the slideshow
Related:
Here is a recent tutorial on the Curves tool - https://youtu.be/O33usVs6rBg


More new
The Slideshow
More new
features:
Howler
Features
See the
main list:
List of
Main Features
| subscribe to our newsletter |
|
|