into 3D: draw
a shape, and see it
automatically turn it into 3D
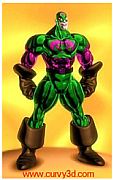
Archipelis
Designer
cool
tool for rapid 3D model creation and prototyping from images
|
New
v1.5
Fast
3D sketching, colormap, bumpmap and displacement map painting and
digital & sculpting:
Curvy 3D
the fun & intuitive way to
sculpt!
...it's not modeling, it's better:
It's
liberal sculpting!
Great for Fantasy Art, Concept Art & 3D Design, making 3D props, ...
|
Inventory Blowout
Sale:

Poser 6 (boxed!) at
lowest prices:
for MacOs
or Windows
|
|
|
|
Modifying
the frames of an Animated Brush
|
And now of course
you're ready to turn this into a truly animated brush by modifying the
frames it contains. For example, you could change the scale (size) of
the images with a transform tool. Or modify the colors across the
frames.
To modify the images of the animated brush frame sequence, use a tool
similar to the animation Timeline editor, but located in the Brush
submenu:
Brush > Animated
brush > Animated brush timeline...
|
 |
The animated brush timeline shows similar features to the regular
timeline editor from the Animation menu. One difference is that the
preview shows the parts which are transparent (checker pattern).
Also, in the top it shows a source frame sequence, and a
destination image sequence. Once you've applied a filter across
the source frames, you'll see a resulting set of images in the
destination sequence. You can then use the Options menu to keep this
most recent render (as new source) for further processing, or to send
the destination (or the source) back to the active custom brush used by
PD.
|
 |
For example, select the first filter in the Adjust group: Color
adjustment
The sliders for Red, Green and Blue are multipliers to the channels of
the brush images. That's why it's a good idea to have plain white
colors in the brush image to start from.
|
If you want to make an animated brush that repeats a changing color
transition, you could start by making sure that the last frame color is
the same as the first frame color. Select the first frame in the
timeline, and click "+" to add a key, then scrub to the last frame:
|

Click the "+" (add key) button at the end to make the color be the same
as at the start of the sequence.
|
Then select a difference frame position along the timeline, change some
of the colors, and add a keyframe there too.
|
Repeat this for a few more keyframes, and varying colors:
|
 |
Soon you should have a set of color-changing keyframes. The transition
graph shows some of the channels changing, with Spline interpolation
(by default) or straight-line linear interpolation.
|
 |

When you're done setting the keyframes, simply Render the filter across
the image sequence.
< click Render
|
The timeline editor will apply the filter to all frames, with changing
values across the keyframes.
 |

As soon as the rendering is completed, you can send the new
'Destination' sequence back to the active brush system of PD Pro.
Options
> Use 'dest' as brush
|
Ta-dah! you can now paint with this newly created animated brush, in
which the color is changing repeatedly
|
 |
|
|
|

parallels desktop for Mac


redefining the meaning
of
window-shopping on a Mac
|
|


